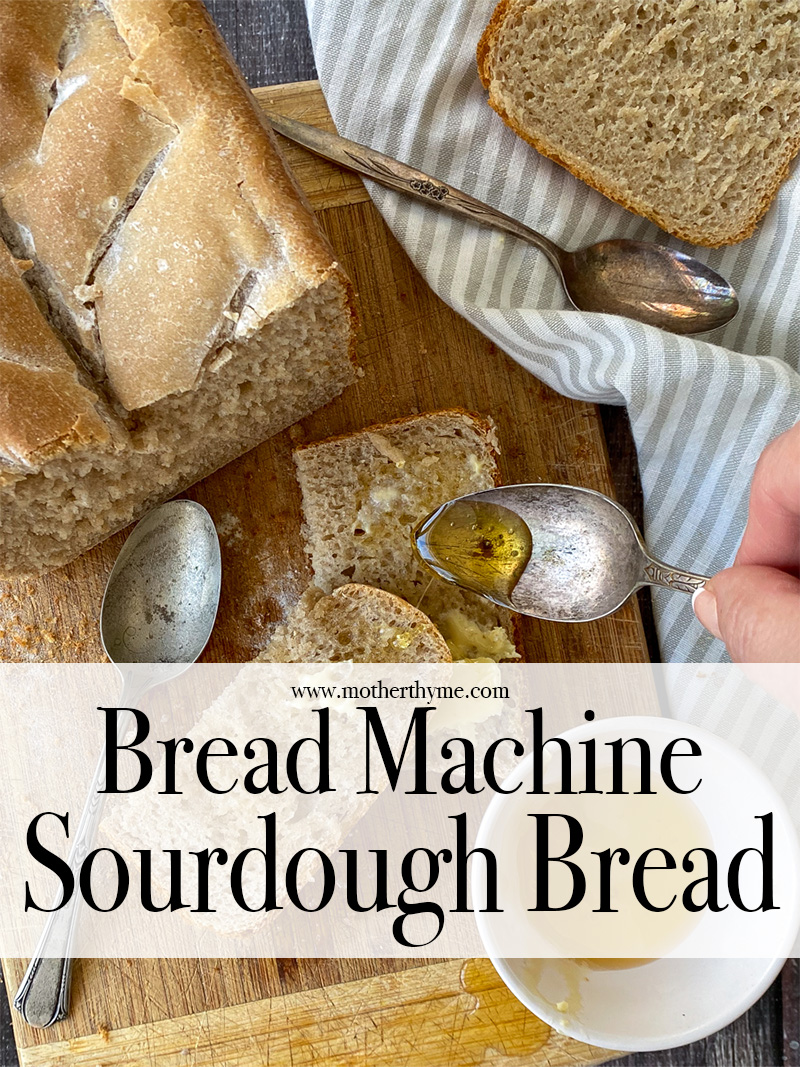
Bread Machine Sourdough Bread
This sourdough bread made in the bread machine makes one delicious loaf of sourdough!
I love baking bread in my bread machine. I have my go-to easy basic bread machine bread that is dump and go. I love that I can easily add everything to my bread machine and in a little over three hours I have a warm loaf of homemade bread.
Sourdough is a different breed when it comes to bread making, especially if you want that tangy loaf of sourdough that sourdough is known for; so making it in the bread machine is a little different but the end result with this recipe is so good!
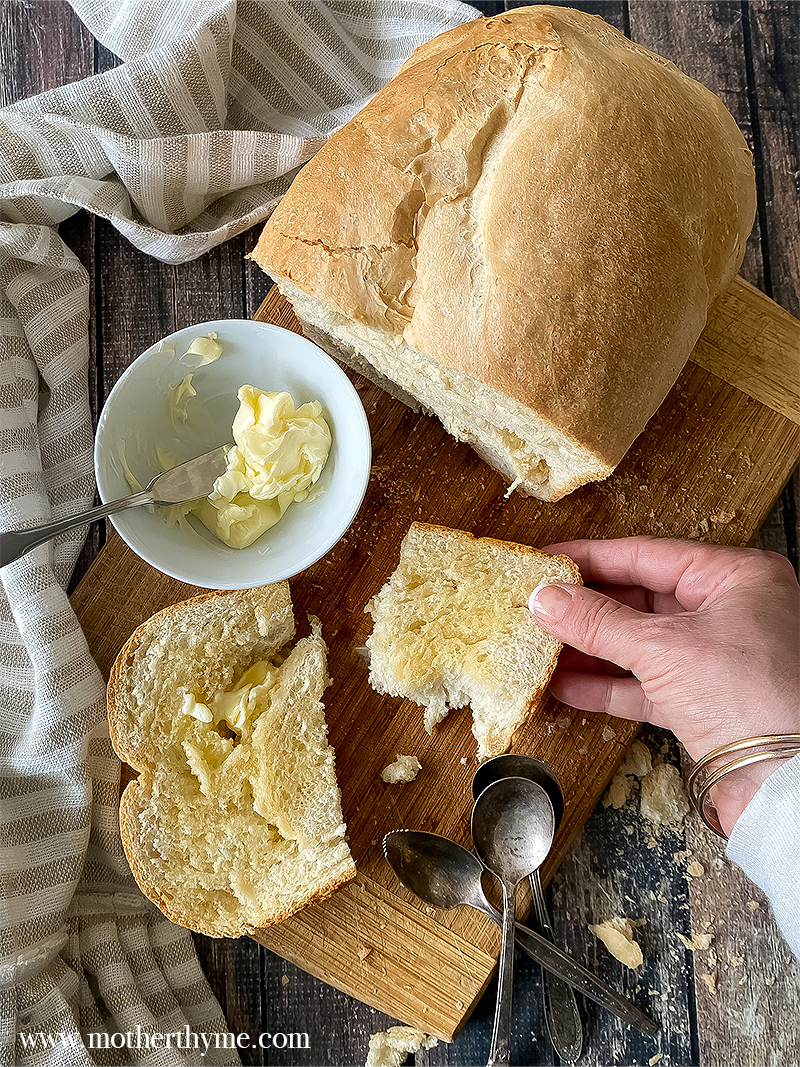
While this is not exactly the same as a loaf of sourdough that requires hours of bulk fermenting and a long overnight rise in the refrigerator, this bread machine sourdough checks a lot of the boxes for a good loaf of sourdough that can easily be whipped up. It makes a delicious loaf of sourdough bread perfect for sandwiches (it’s so good!) or to serve warm with dinner. I love it for French toast too!
So what makes this different than other bread machine sourdough recipes? Well first this recipe does not use any additional instant yeast. You just use an active bubbly sourdough starter. This sourdough bread also sits for 6-8 hours in the bread machine after the dough is made to slowly rise before baking. Wait until you see. When you check it after a few hours and see it rising is so rewarding and it didn’t take much to do!
Sourdough Starter
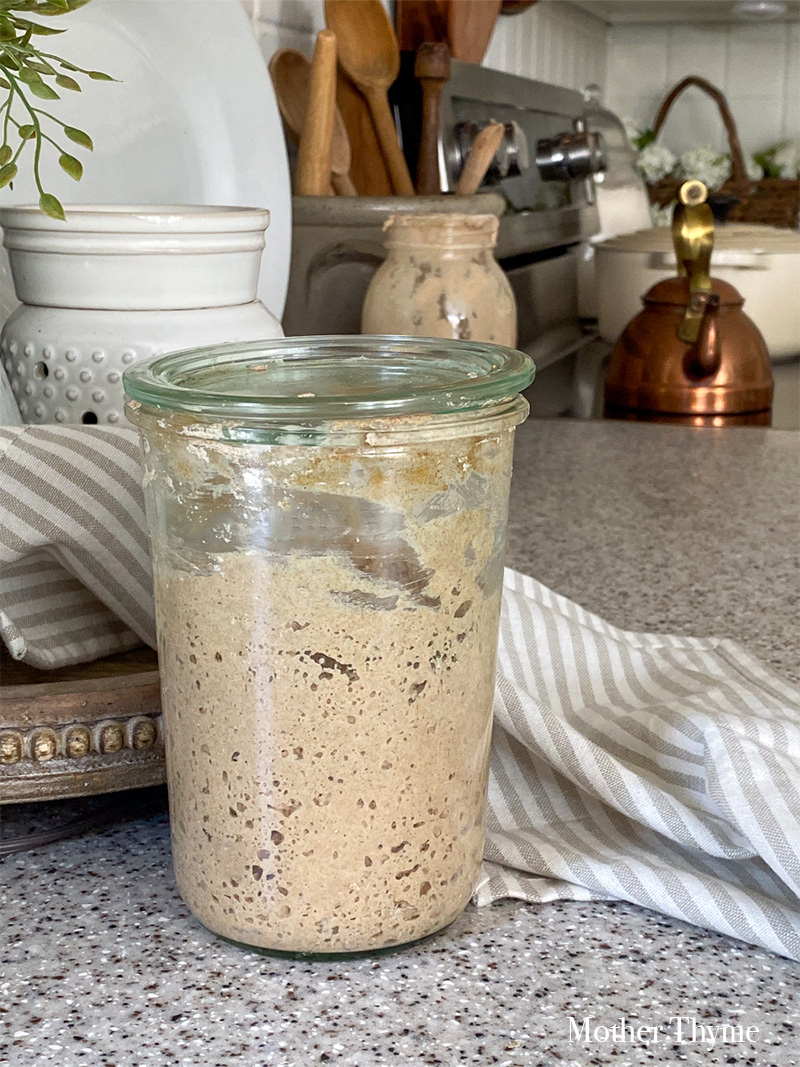
Speaking of sourdough starters, my sourdough starter is just a 1:1 ratio of flour (I recommend rye or a combination of rye with unbleached all-purpose flour) and filtered water that I fed daily. I’ve made starters before with just organic all-purpose flour but once I switched to incorporating rye flour in my feedings, my starters are happy and thriving.
What Is A Sourdough Starter?
A sourdough starter, also known as the mother dough is a living culture of wild yeast and lactic acid bacteria made with flour and water and letting it to ferment. Once active the sourdough starter is used to make bread. It is a method that has been around for thousands of years.
Types of Flour to Use
- Organic unbleached all-purpose flour (I recommend Bob’s Red Mill) – It is the most common and will develop a healthy starter.
- Whole Wheat Flour – I recommend whole wheat flour to kick off the initial starter. Then use along with all-purpose flour in 50:50 ratio.
- Bread Flour – It has a higher protein content which can help give the starter strength.
- Rye Flour – This is my preferred flour. It can be used alone or in combination with other flour like all-purpose. The rye contains enzymes that really boost fermentation.
- Spelt Flour – This is an ancient grain that will add a nutty flavor to the bread.
- Einkorn Flour – An ancient grain that will add a delicious nutty flavor to the bread.
You can even use a combination of all-purpose flour and rye. I’ve done 50:50 ratio of all-purpose and rye flour. I do 50 grams of all-purpose flour and 50 grams of rye flour but your ratio will depend on how much you are feeding. Some feedings I do a 75:25 ratio of all purpose and rye flour. For me that is 75 grams of all-purpose flour and 25 grams of rye flour. Again your ratio will depend on how much you are feeding.
Water
You want to use filtered water. I use filtered water from my Berkey. You can also use bottled spring water. Avoid using tap water if possible. If tap water is your only option, add some tap water to a bowl and let it set out uncovered for 24 hours before using to remove the chlorine.
Tools
- Glass mason jars. You don’t want anything too big or too small. I like to use these 32 oz. wide mouth mason jars. I like the wide mouth so it is easy to stir and discard. I also like these Weck jars.
- Flour sack towel like these that I use, or a similar kitchen towel or cheesecloth to cover jars but allow them to breathe.
- Digital scale – for accurate measuring. I have provided volume measurements but recommend a digital scare for precise weight measurements. This is the one I use.
- Spatula – to scrape the sides of the mason jar.
- Wood spoons – for mixing.
- Digital Thermometer – I like to use this to check to the temperature of the water. I use a Thermopen.
Starter Schedule
- DAY 1 – Start by mixing 100 grams of flour and 100 grams of 70-75 degree Fahrenheit filtered water in a mason jar until combined. Add a rubber band around your jar at the top of the line where your starter is so you can check how much it grows. Loosely cover it for 24 hours.
- DAY 2 – No feeding.
After DAY 2 the “starter” needs to be fed every 24 hours, sometimes twice a day if it’s hungry. It is not uncommon after a few days and even when the start is mature and active that it will require feedings every 12 hours.
- DAY 3 Remove/discard all but 100 grams of starter in the jar. Then add 100 grams flour and 100 grams of 70-75 degree Fahrenheit filtered water to the leftover mixture/starter and mix together until combined. Add a rubber band around the jar to monitor the growth of the starter and loosely cover with a tea towel or loose fitting lid (it needs a little air to breath) and let it sit again for 24 hours.
Continue to do this every 24 hours for 7-14 days until your starter becomes active. You can tell it is active when it has doubled in size and is nice and bubbly and has a dome shape top.
How Long Will It Take?
Creating an active starter can take anywhere from 7-14 days, so don’t be alarmed if your starter is not ready to go after 7 days. It’s actually quite common. Mine took longer. Many factors play into how long a starter will become active like type of flour you use, how often you are feeding it, and even the temperature in your home. It is ideal to have it in a warmer environment 70-75 degrees. If your home is not at that temperature, it will still work it just may take a little longer.
If you keep your home cooler, just set it in a warmer place in your home, such as close to a vent. Avoid storing it near the window. You don’t want it to get too hot.
My home is usually 68-69 degrees and one of the reasons mine took a little longer.
Feeding Your Active Starter
A starter sitting on the counter needs to be fed daily, meaning you need to discard some of the starter and feed it with flour and filtered water. The ratio you want to do is up to you. I do 100 grams, so I keep 100 grams of starter in my jar then add 100 grams of flour and 100 grams of filtered water. If you want more starter, just keep more starter but then make sure you add the same about of flour and filtered water.
Some starters, especially young, active starters get hungry more often (just like my teenage kids) so you may even need to feed your starter every 12 hours. You can tell it’s hungry by the smell or if the bubbles begin to fall, it’s time to for a feeding.
For example if you want 200 grams of starter, you need to feed it with 200 grams of flour and 200 grams of filtered water. If you keep it on your counter, you need to discard and feed that amount daily.
What I Do
In case you are wondering what I do I have several starters. One in the refrigerator and one that I feed daily on the counter. I also have dried starter as a backup too. I like to maintain mine at 100 grams of daily feedings, meaning for the daily feeding I keep 100 grams of starter and feed it with 100 grams of flour and 100 grams of water. For me it is just easy to maintain that way.
You can do less or more depending on how often you plan on using your starter and how much starter you need.
Refrigerate Starter If Not Using Daily
If you don’t plan to use your starter daily, you can keep it in your refrigerator and feed it weekly. If it gets a little dark liquid on top called “hooch” just pour that off, give it a stir, do a discard and a fresh feeding.
Allow it to sit on the counter until bubbly, doubled in size to reactivate your starter before using in recipes.
Clean Jars
And since this is a living yeast culture always look for signs of mold or anything growing on it. If it show signs of mold, toss it away and start over again.
I like to transfer my starter every few days to clean mason jars to prevent any mold growth. So every few days when I do a feeding I transfer the starter to a new mason jar and clean the one it is in.
The Float Test
You can test your starter after 10 days add a spoonful of in a bowl of water to see if it floats. If it floats, it’s ready to go. But just because it doesn’t float doesn’t mean it is not active. If you use rye flour like I do for my starter rye flour starters and even whole wheat starters typically don’t float. The best test is that the starter has doubled in size, is nice and bubbly and has a pleasant smell.
Buy A Starter
Now if you don’t want to go through the process of making a starter like I’ve outlined above, there are plenty of starter kits available to purchase.
Cultures for Health is a good one I recommend that you can buy HERE.
I could go on and on about sourdough and what I’ve learned and discovered on my sourdough journey but you’re here for the recipe on how to make sourdough bread in the bread machine. I just wanted to cover how to make the starter above in case you want to make the bread but don’t have a starter.
And one last thing about a starter. If you don’t have a starter, maybe you know someone that does. Get some of their starter to start growing your own. Once you start your sourdough starter it will live long as long as you keep it fed and happy.
Ok, now on to the recipe!
Once or if you have an active sourdough starter, you are ready to go!
Wait until you see how easy this is!
What You Need
- 1 1/4 cup (284 grams/10 oz) filtered water
- 1 cup active sourdough starter (the weight in grams can vary depending on the bubbles and co2 of the starter. It is approximately 200 grams of starter)
- 2 tablespoons (28 grams) olive oil
- 3 1/2 cups (455 grams) bread flour *
- 2 tablespoons (26 grams) light brown sugar
- 1 1/2 teaspoon (9 grams) salt
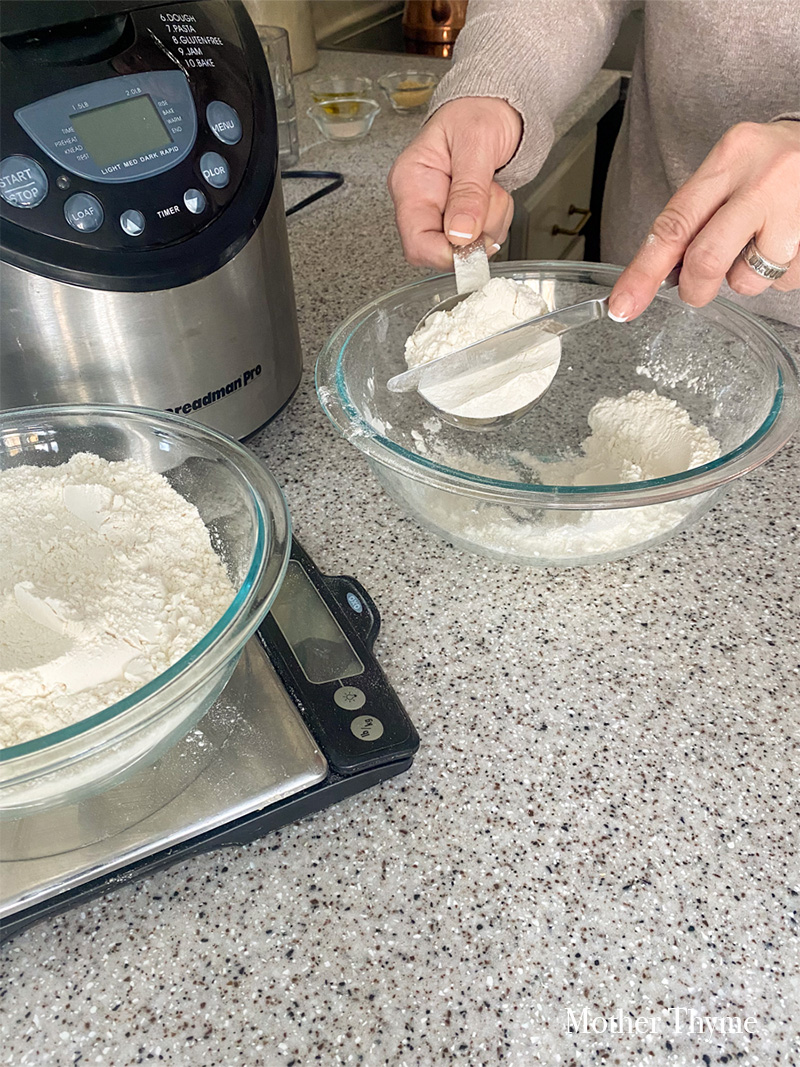
Measuring Flour
Make sure you are accurately measuring your flour. I recommend using a digital scale for accurate results. When measuring flour don’t scoop the measuring cup in the flour, instead scoop spoonfuls of flour into the measuring cup with a spoon overfilling the measuring cup, then level it off with a butter knife.
My bread flour measurement is 1 cup of bread flour = 130 grams, 1/2 cup bread flour = 65 grams. You need 455 grams (3 1/2 cups) bread flour for this recipe.
Just six ingredients, that’s it!
Simply add the ingredients into your bread machine as list (wet then dry ingredients on top), set the bread machine to the DOUGH setting for 1 hour and 30 minutes, close the machine and let the machine make the dough.
That’s it!
For best results accurate measure ingredients.
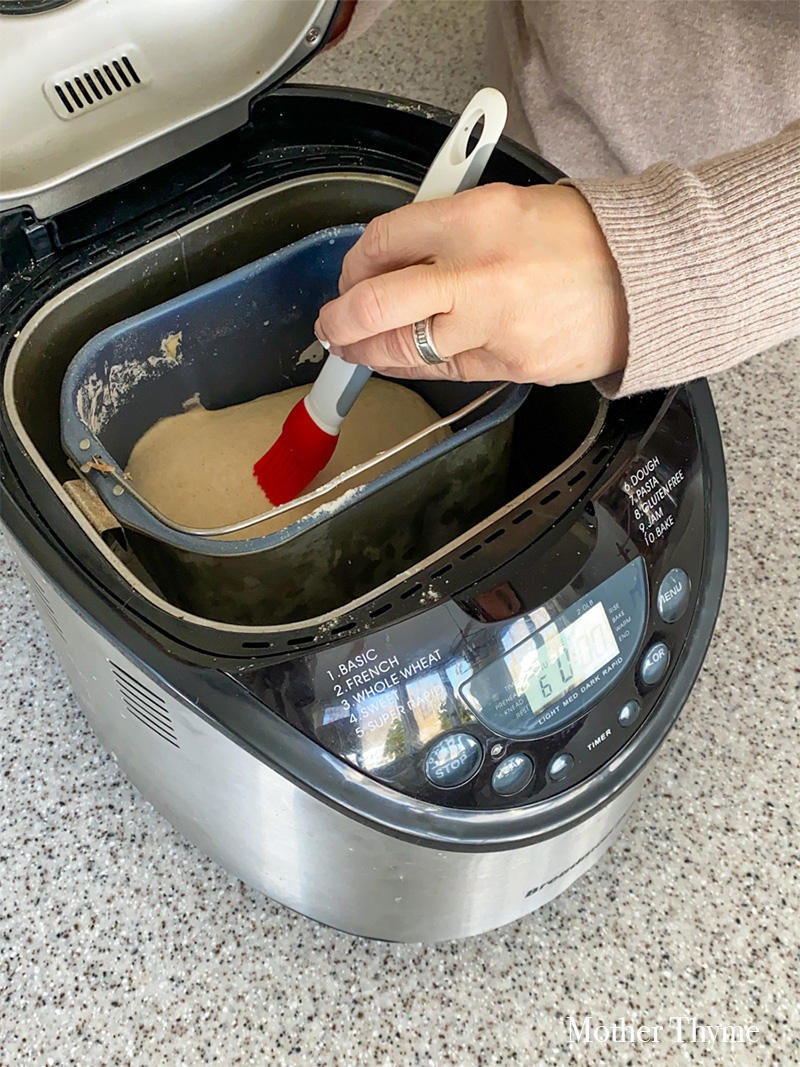
Once the dough is done, then it is time to just let it sit…for 6-8 hours. This will allow the bread to slowly rise. And wait until you see! It’s so rewarding. When you see the risen loaf is a sense of accomplishment and you are one step closer to enjoy the fruits of your labor.
I like to lightly brush it with a little water on top (not a lot) and let it sit.
The amount of time to let it rise is determined on how active your starter was and the climate in your home. Mine usually rises in fully in 5-6 hours.
If you prefer, you can transfer the dough to a greased loaf pan and cover with a tea towel or flour sack and let it sit on the counter to rise.
I like to make this first thing in the morning to have for dinner or I’ll make it right before I go to bed so I have can bake it first thing in the morning for breakfast.
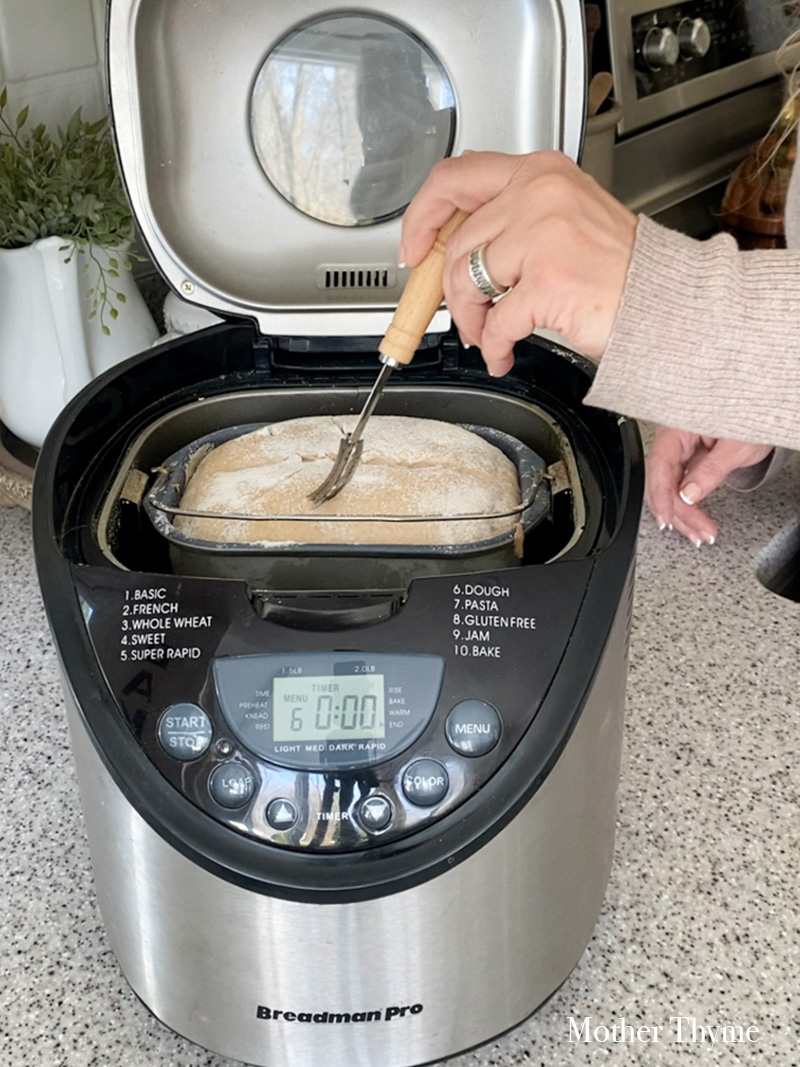
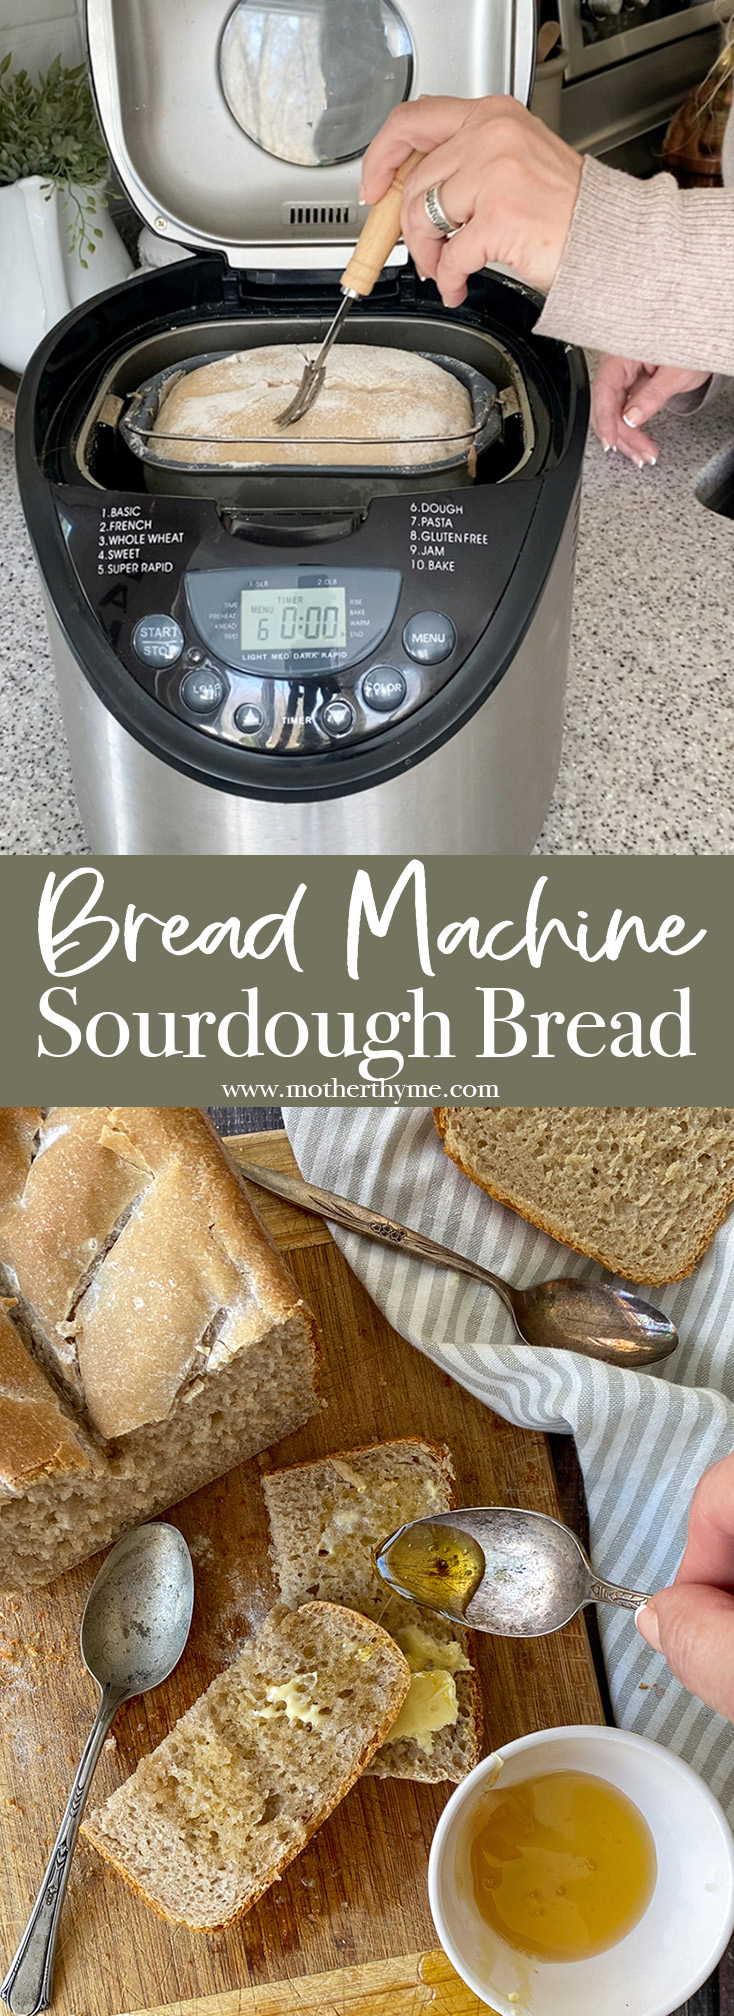
Once the dough is risen, it’s time to bake. I like to score mine with my lame but that is totally optional. I like to do it to give it more of that artisan bread look. I also dust it with a little flour too, again totally optional.
Then choose the BAKE option on your bread machine for 1 hour and you are 1 hour away for a fresh and warm homemade loaf of sourdough bread!
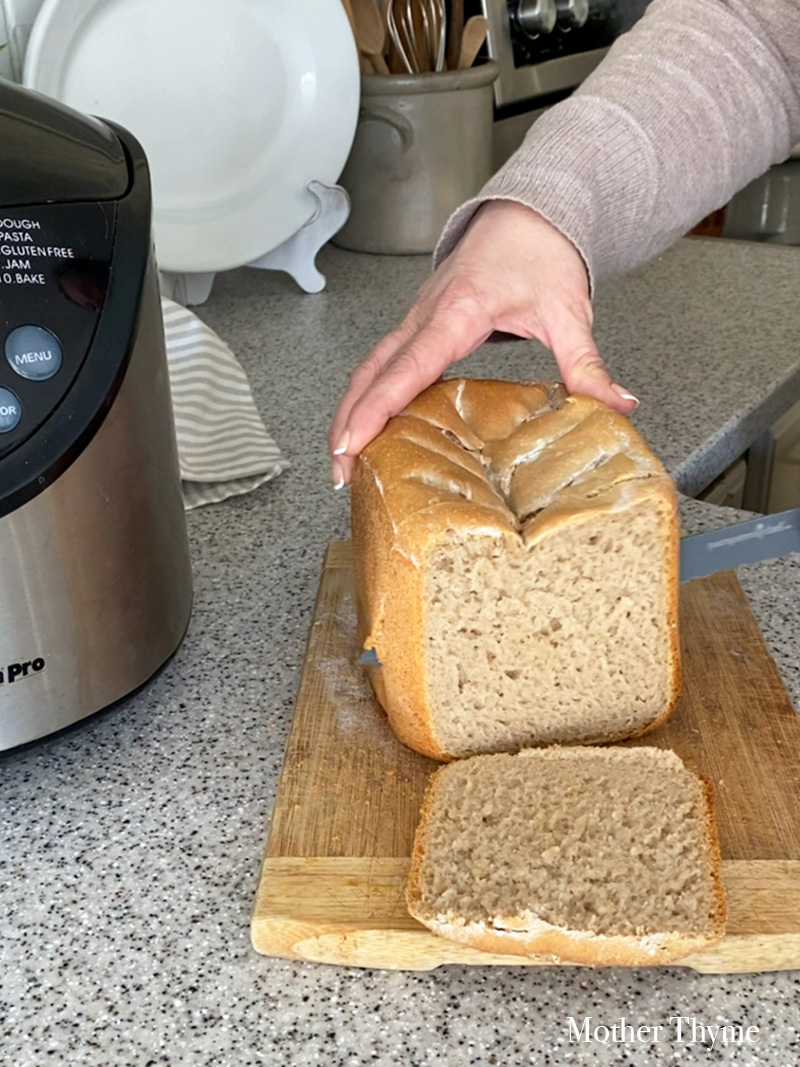
Once it is done, I like to let it cool just for a few minutes then turn it over and remove it from the loaf pan to let it cool.
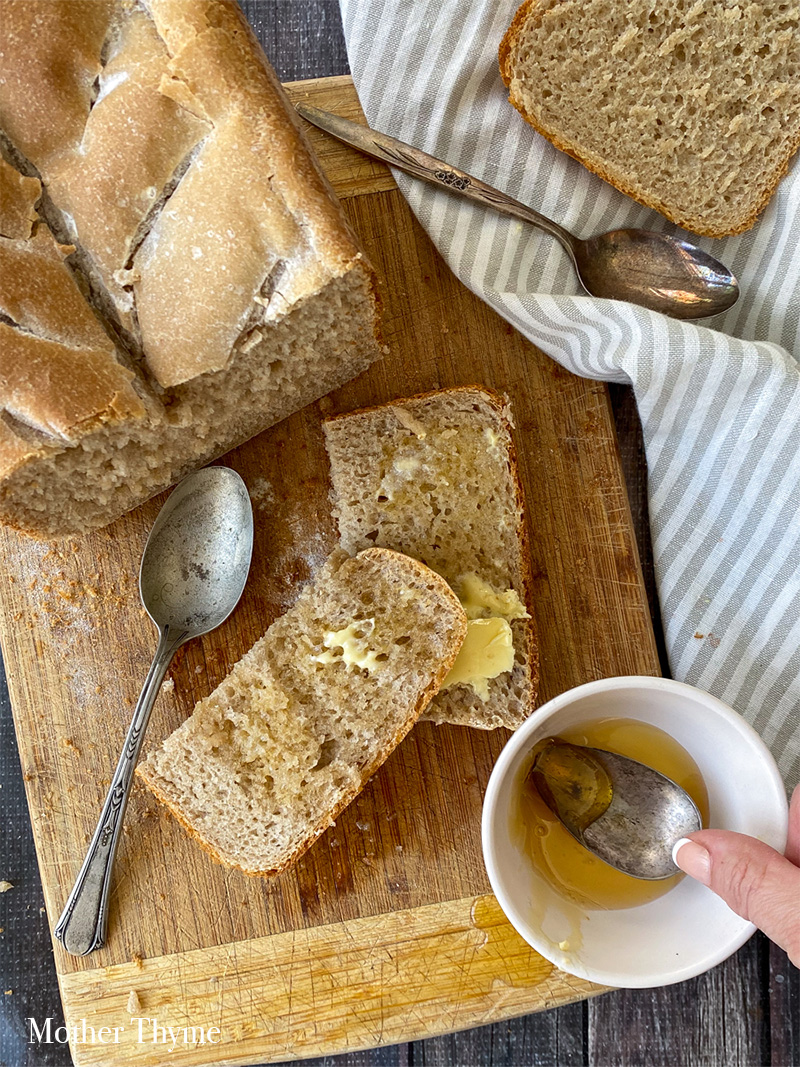
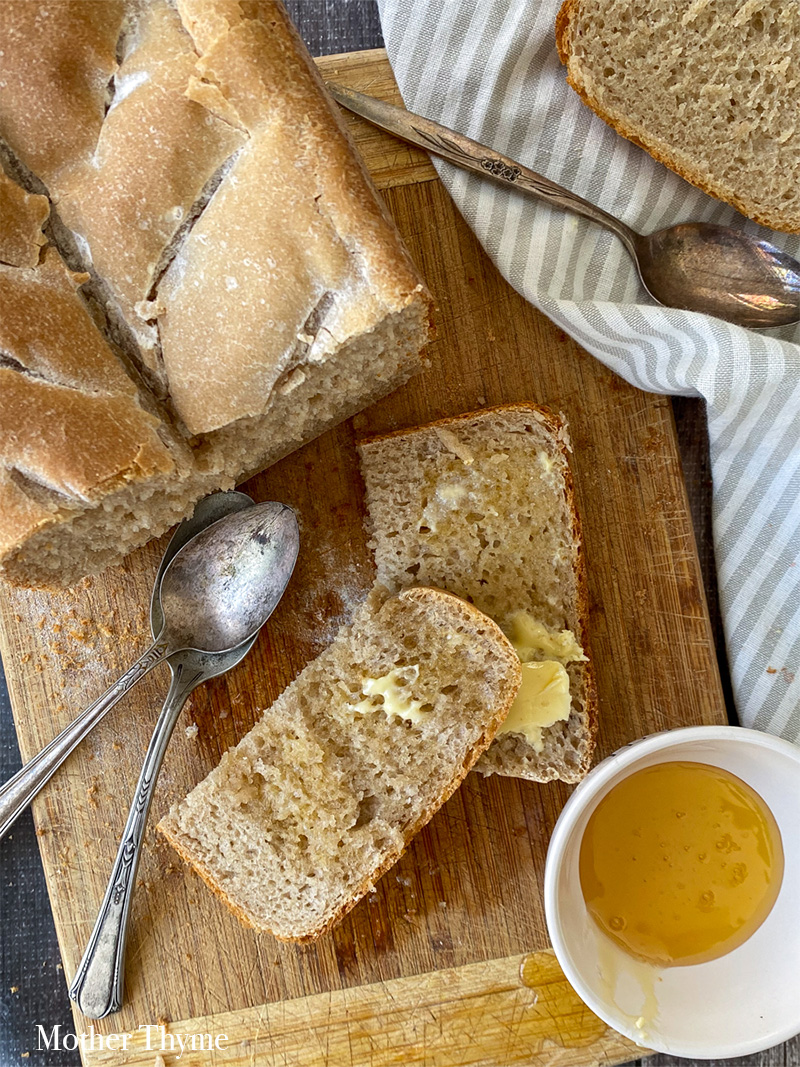
And that’s it! Pretty easy, right? And it has that delicious, tangy flavor that you find in a classic loaf of sourdough. This makes a great sourdough sandwich bread or serve warm with butter and honey! That’s my favorite!
Troubleshoot
My loaf didn’t rise.
Check to make sure you are using an active, bubbly starter that was fed within the last 12 hours.
My dough didn’t form a ball.
Check your measurements. You may have used too much flour or didn’t add enough water or starter.
My bread machine doesn’t have a DOUGH setting.
If you don’t have a dough setting, you may have a knead setting. Depending on the time of your need setting you may need to do that cycle a few times.
How long to bake in the oven?
If you prefer to bake it in the oven instead of using the bread machine. Remove dough when done with the dough cycle in the bread machine, transfer to greased loaf pan and place dough seam side down and cover with a tea towel to allow bread to rise for 6-8 hours. When ready preheat oven to 350 and bake for 30-40 minutes.
PrintBread Machine Sourdough Bread
- Prep Time: 10 minutes
- 1 1/2 hours dough: 6-8 hours rise time
- Cook Time: 1 hour bake time
- Total Time: 25 minute
- Yield: 1 loaf
- Method: bread machine
- Cuisine: bread
Ingredients
- 1 1/4 cup (284 grams/10 oz) filtered water
- 1 cup active sourdough starter (the weight in grams can vary depending on the bubbles and co2 of the starter. It is approximately 200 grams of starter)
- 2 tablespoons (28 grams) olive oil
- 3 1/2 cups (455 grams) bread flour *
- 2 tablespoons (26 grams) light brown sugar
- 1 1/2 teaspoon (9 grams) salt
Instructions
- Place ingredients in the order listed in to bread machine.
- Close lid and set to DOUGH for 1 1/2 hours.
- Once cycle is complete lightly brush with water and let dough set in machine for 6-8 hours to allow additional time to slowly rise completely.
- Once the has risen (6-8 hours) use BAKE cycle on bread machine and bake for 1 hour. (Optional – before baking lightly dust with flour and use lame on top of bread. This is not necessary to do unless you want an artisan looking loaf)
- Once done, allow to cool for about 10-15 minutes then remove from pan to finish cooling.
Notes
- To bake in oven, after dough cycle is complete, remove dough from bread machine and place seam side down in a greased loaf pan. Cover with a tea towel and allow 6-8 hours to rise.
- When ready to bake, preheat oven to 350 degrees Fahrenheit and bake on center rack for 30-40 minutes).
- Optional – Before baking lightly dust top of loaf of bread with flour and use lame to create a pattern on top for artisan loaf. This is not necessary to do.
Measuring Flour
Make sure you are accurately measuring your flour. I recommend using a digital scale for accurate results. When measuring flour don’t scoop the measuring cup in the flour, instead scoop spoonfuls of flour into the measuring cup with a spoon overfilling the measuring cup, then level it off with a butter knife.
My bread flour measurement is 1 cup of bread flour = 130 grams, 1/2 cup bread flour = 65 grams. You need 455 grams (3 1/2 cups) bread flour for this recipe.
Disclosure – This post contains affiliate links. Thanks for shopping my links that support my website.