Dollar Tree Chunky Wood Pumpkin and Free Printable Tags
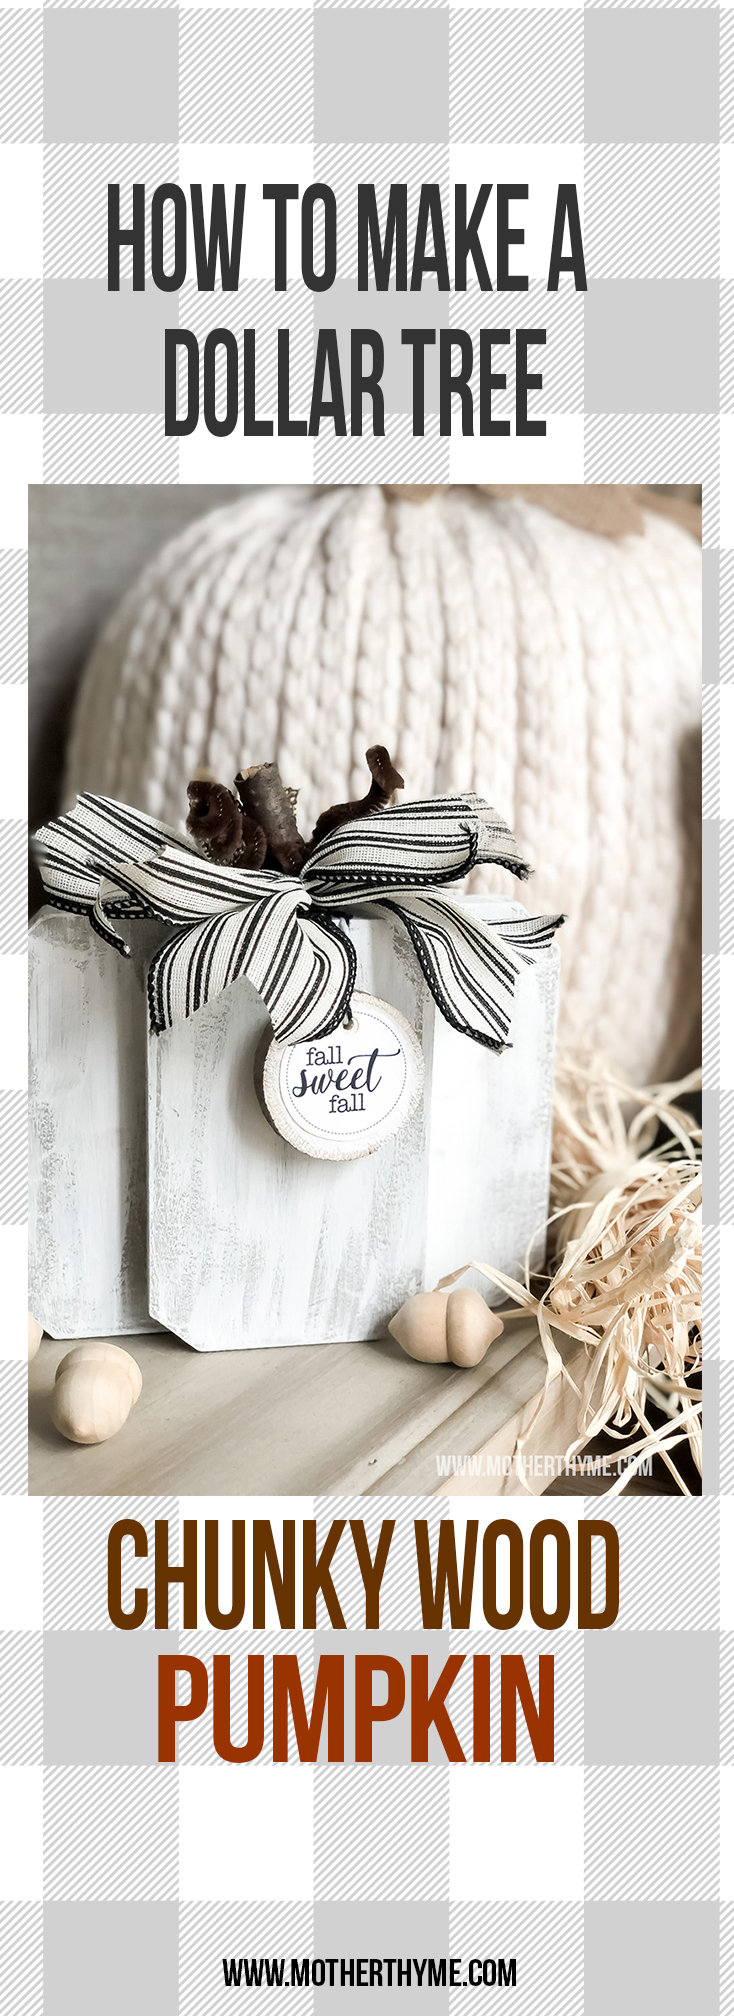
Wait until you see how cute this chunky wood pumpkin is using 4 wooden pumpkins from Dollar Tree, some paint, and whatever embellishments you have on hand!
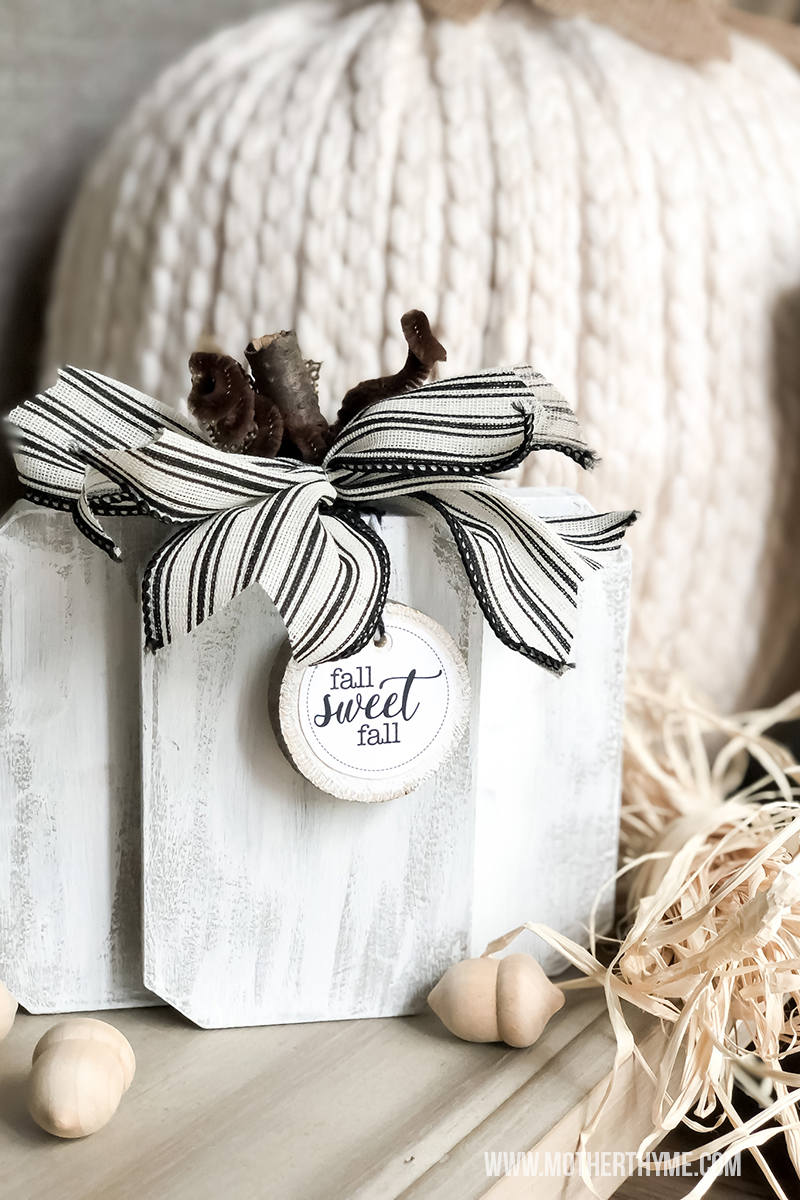
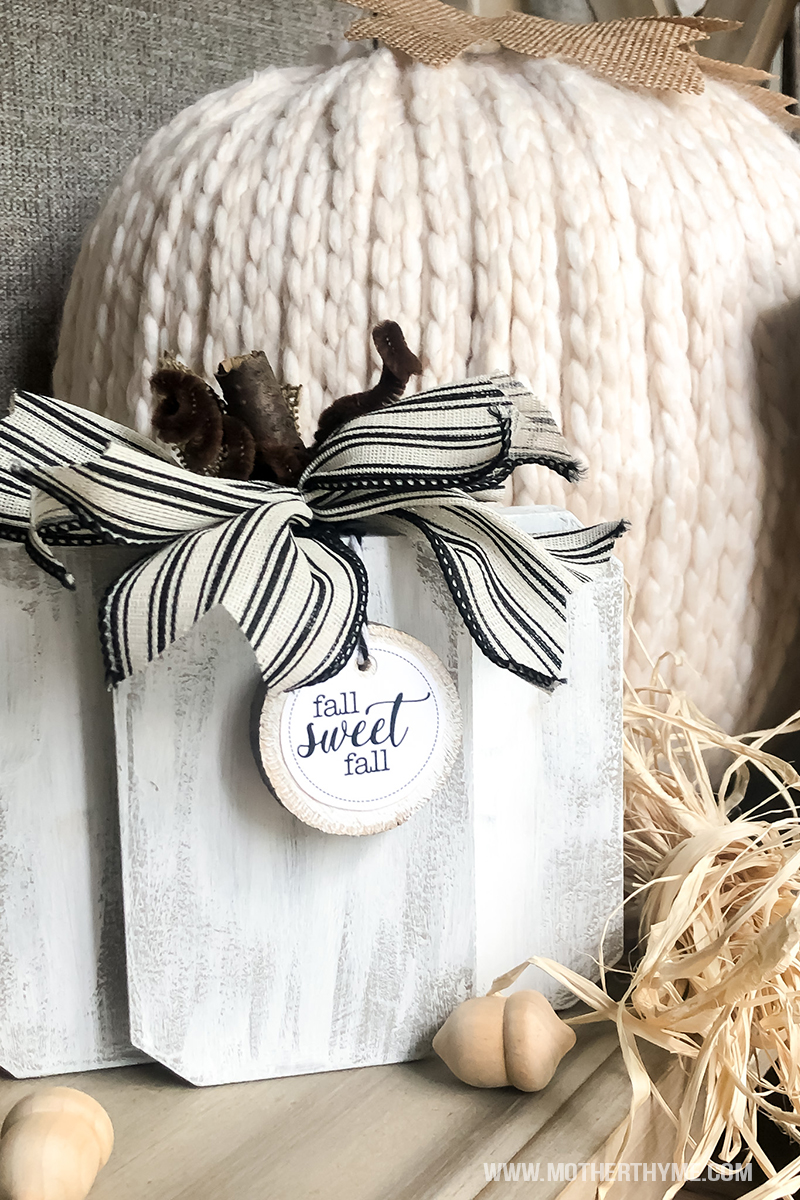
How cute this chunky wood pumpkin? I love it! It looks like I got it at a cute little shop or craft show. But no! It’s simply 4 wooden pumpkins that you have probably seen from Dollar Tree, a little paint, super glue, and whatever little embellishments you have on hand! Easy peasy my friends!
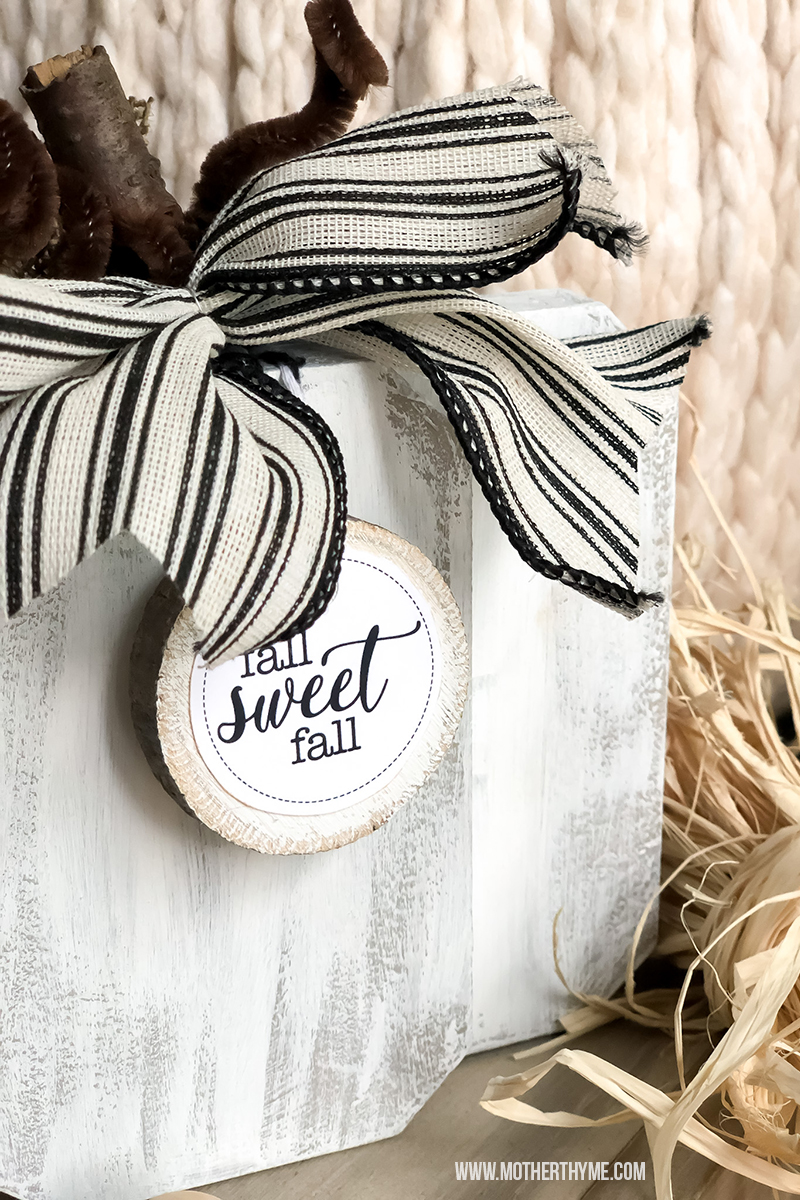
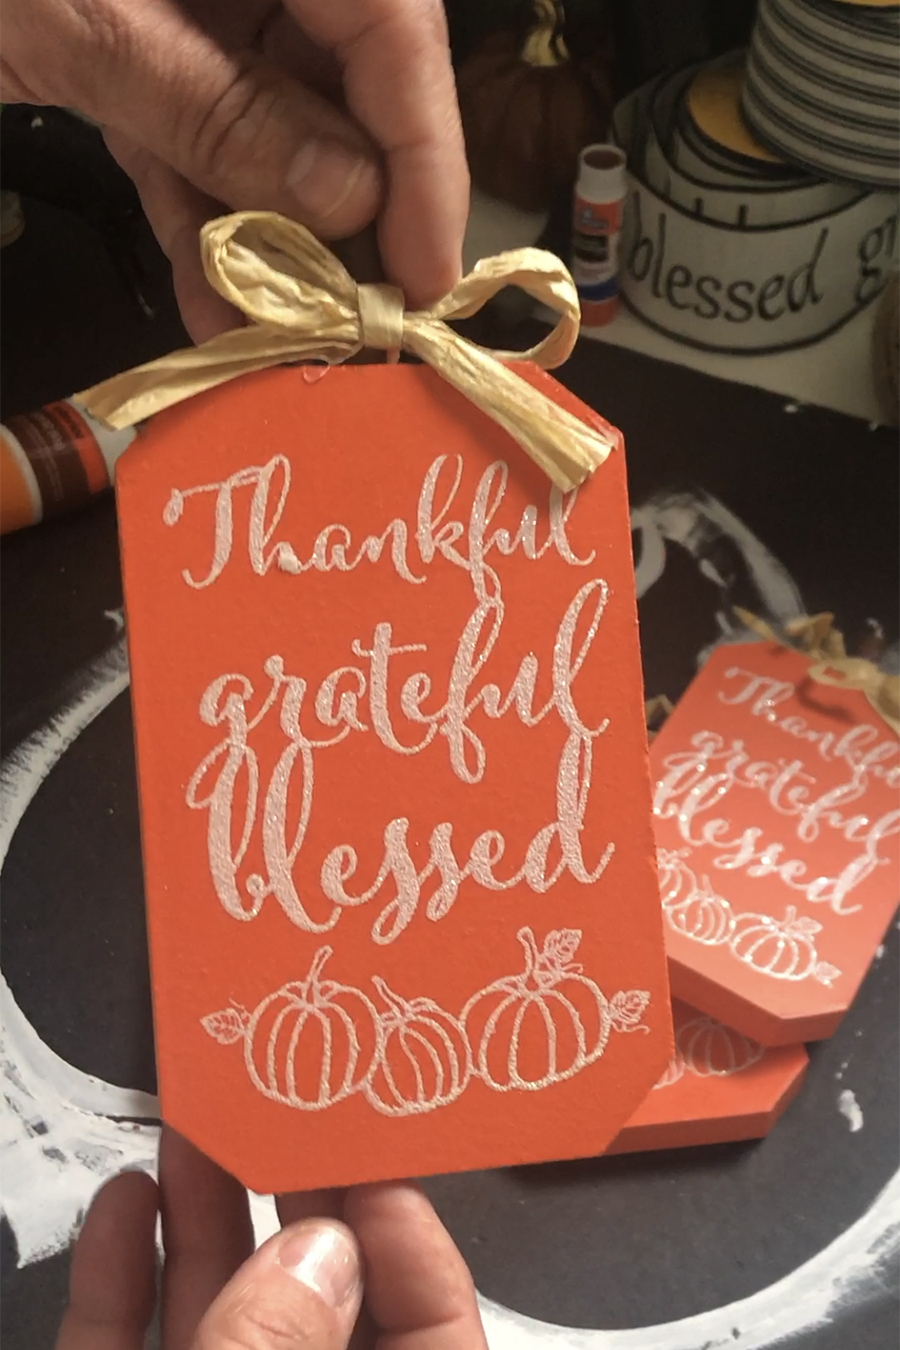
Not only is this super cute but I love you can customize it too! I added a tag using wooden bark ornaments that I found at Hobby Lobby but there are so many things you could do!
- Use vinyl lettering to add family name or monogram.
- Make it double sided and use a tag on one side and vinyl lettering on the other.
- Add some cute burlap and some stamps to attach a cute little sentiment.
Or you don’t have to add anything at all and enjoy this pumpkin in all it’s cuteness as is!
Here’s what you need
- 4 wooden pumpkins that you’ve probably seen at Dollar Tree.
- Sand paper or sanding block (mine is from Dollar Tree).
- Hot glue.
- Wood filler, optional.
- Paint – I use FolkArt paint in the color Barn Wood from Hobby Lobby.
- Paint – I use FolkArt chalk paint in the color White Adirondack from Hobby Lobby.
- Super glue – I use the super glue gel from Dollar Tree.
- A little burlap or felt to make some cute leaves
- Ribbon to make the bow.
- Pipe cleaner – optional.
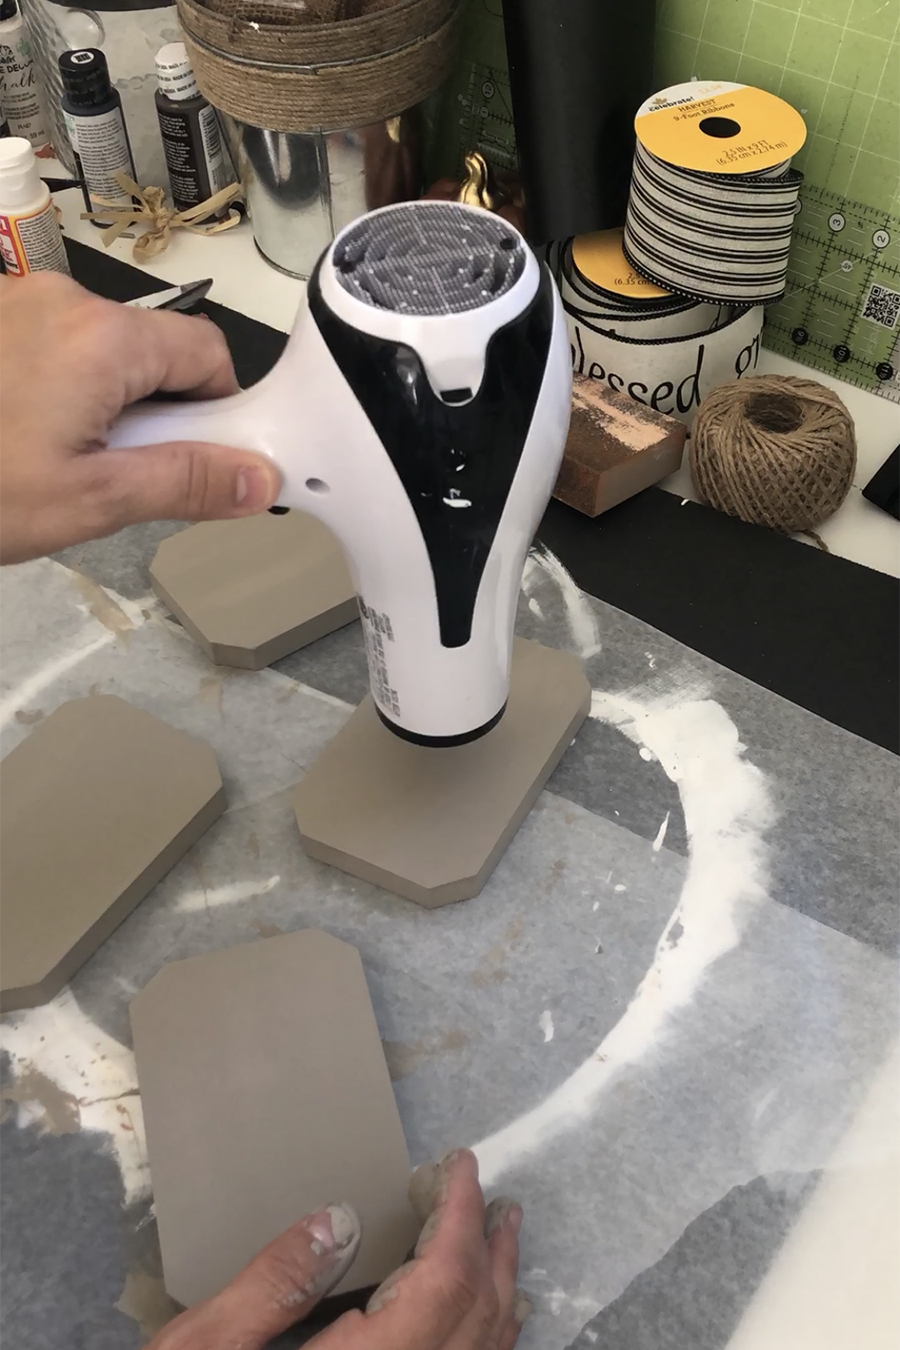
- Hair dryer to speed up drying – optional.
- Wood bark ornaments from Christmas section at Hobby Lobby – optional
- Bakers twine if you want to switch out the twine on the tag like I did – optional
How to make
Start by removing sticker off the back. Use a hair dryer to help remove the sticker easily.
Remove the stem and bow from tops. You may need some pilers to help you.
Sand the top of pumpkin to remove glitter and to smooth out. Sand the back side where sticker was too.
Add hot glue to hole where stem was. You can also use wood filler too. Once hot glue is set sand down so it’s smooth.
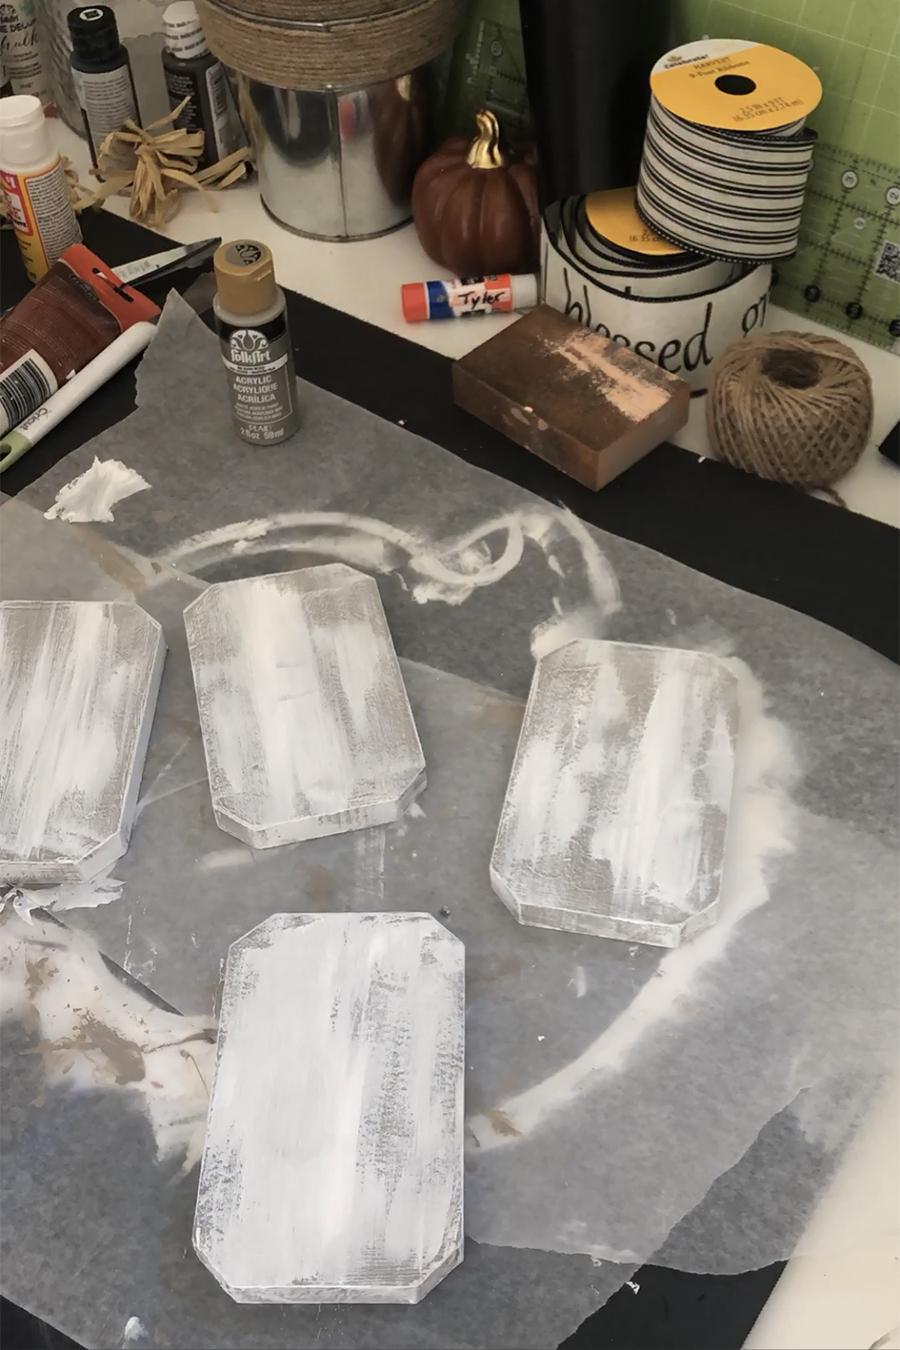
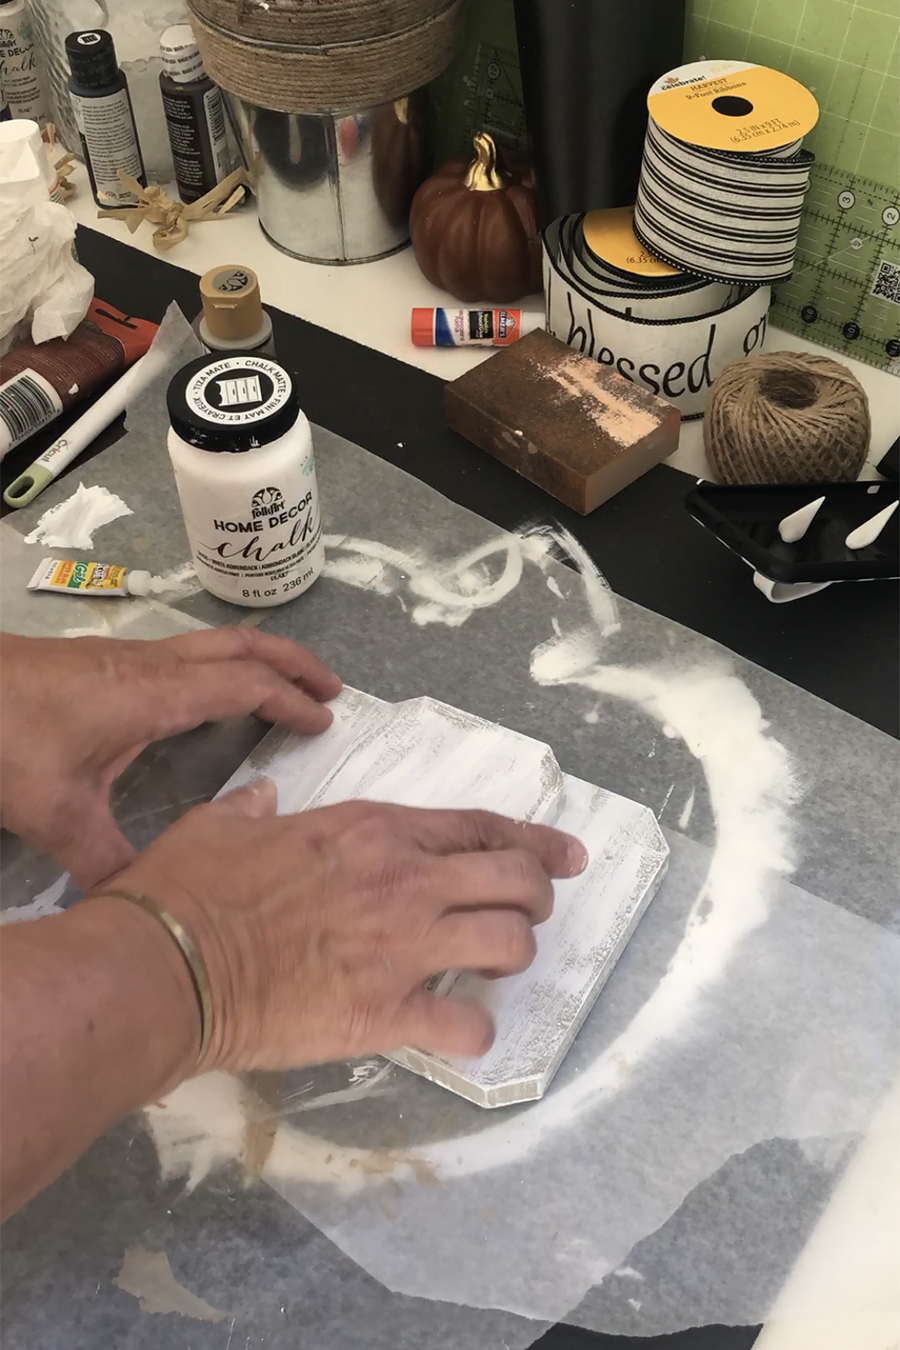
Paint all sides of each pumpkin with a a few coats of FolkArt paint in Barn Wood.
Once dry, add a light dry brush to all sides with FolkArt chalk paint in the color White Adirondack to create that distressed look.
Place two pumpkins side by side and attach using super glue.
Attach a pumpkin to the front and back center adhering with super glue.
Once set, super glue a stem. You can replace with one of the stems or find one outside.
Wrap a pipe cleaner around a pencil to create a curly Q and add to the stem along with any embellishments you’d like.

For the tag I lightly dry brushed chalk paint to the front and then used a glue stick to add the printable. I switched out the twine for bakers twine and stuck in in the center to hang.
You can watch the full process on my Instagram page.
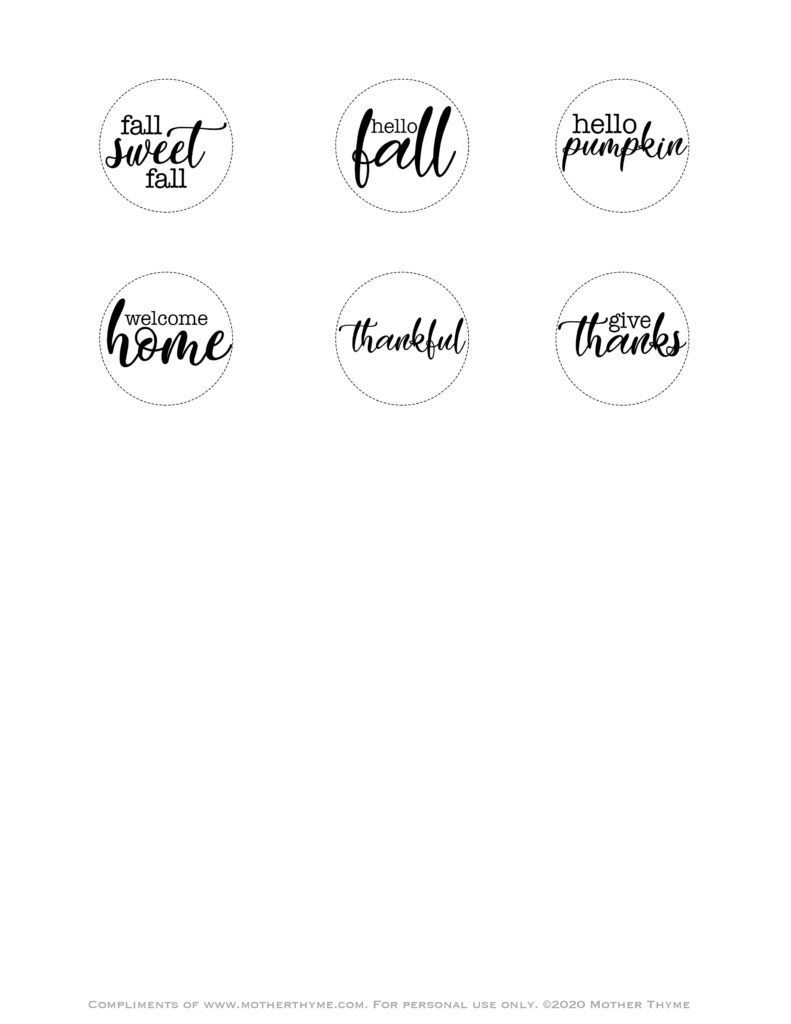
Download the free printables HERE
If you make this pumpkin, I’d love to see! Snap a picture and tag me on Instagram at motherthyme!