Cake Decorating: Part 1
Guess what? I have been taking a little cake decorating class for the last couple weeks. I decided to do it to learn some techniques and just to have a little mommy time one night a week. I oddly find this to be relaxing. Some people go for pedicures to get away; I on the other hand go to decorate cakes then I’ll get a pedi on the way home.
- Baking the cakes. I use a the Wilton 8″ nonstick pans. I used to use just nonstick cooking spray and flour to coat my pans but I tried it with shortening and flour and I see better results when releasing my cakes from the pans. They just slip out and there are minimal crumbs. Wilton also uses a cake release product that I haven’t tried yet.
- A Wilton cake leveler is a must! Again something I wish I invested in years ago! The inexpensive ones are only about $3.99 and if you have the craft store coupons you can usually get it for 40% to 50% off with the coupon. It makes the take level, and is perfect for layering your cake so you have a nice level surface. It is so easy to use. I used to always use just a knife to try to level my cakes, but they still ended up crooked; this makes it perfect.
- Once you torte your cake (meaning split in layers) before you add your filling make a dam around the edges using the icing color that you will use to frost the cake. Add your filling of choose, like pudding, mousse, fruit spread etc… then add your top layer upside down so the bottom of the cake is the top.
- Another great investment was the Wilton Cake Icer Tip. It is big and it works wonders when frosting the rim of the cake. Again, I wish I had this years ago (I think you may hear me say that often).
- A turntable is essential. I purchased the Trim-N-Turn Ultra at the craft store (using my handy 40% coupon as well) to invest in this. Having this along with my Wilton Cake Icer Tip made frosting the outer rim a breeze.
- When icing the cake you want add a lot of frosting on and then as you are frosting remove it. You don’t want to add just a little frosting and try to add more, that is when you may get into problems with crumbs. Add a big dollop on the top, frost and gently remove as you go. I also found using a large angled spatula makes frosting helpful.
- Making the icing. This was interesting for me because I never made frosting before with shortening. I am still processing this but I do understand why making icing with shortening works better for the cake then butter. For the class I followed the recipe in the Wilton class workbook. If you are working in a warm environment the butter icing will never adhere as well as if you are working with shortening for your icing; makes sense the more I think about it. Once I made the icing with shortening I can see the consistency is much better for proper frosting of cakes.
- There are different level of consistency when making frosting. When frosting the cake you want a thin frosting. A good way to test that your frosting is thin is when you stick a spatula in the frosting the spatula easily moves from side to side.
- When adding stars, borders etc… on to the cake you want to work with medium consistency frosting. You don’t want it to thick where it won’t pipe out of the bags but not to thin where it won’t hold its shape when making a border, star etc…
- There is a stiff frosting level as well which I have not worked with yet. That is more for flowers, pedals which I will be learning in upcoming classes.
- When making your icing as you are adding in water (or milk) start with a little and gradually add more to get your desired consistency. I never made frosting with water before; it has always been milk so this was a new style for me too. Milk will make it creamier but I didn’t mind using the water to make the consistency I wanted to achieve.
- To add flavor such as butter, vanilla or almond they purchase at the craft store clear extract that can go into the icing to create the flavor.
- If you tend to get crumbs when frosting you can either do a crumb layer or place your cake in the freezer for a short time and then frost it to help with not getting so many crumbs. So far since I have been in these classes I have been fortunate with not getting as many crumbs but before this I would either do a crumb layer or chill the cake before I frosted it.
- Meringue Powder. A new product for me that I used in the icing. It is alternative to egg whites and I liked using it.
- Confectioners’ Sugar. You want to use a 10x confectioners’ sugar when making icing.
- Couplers. These little gadgets go into the bags and make changing tips easy. I have used tips and bags before but always put my tip inside the bag, cut a hole and started piping. Having a coupler on the bag makes it so easy to change tips.
- Practice before you add it on your cake. I found it helpful to practice my technique on the practice board before I added it to my cake. If I wanted to create dots or stars I did a few on my practice board to know how much pressure and what angle my hand needed to be. I’m a lefty so had to do things opposite but found all the techniques to be easier than expected. If you are using your medium consistency when piping and your hand begins to hurt or you find that you are applying to much pressure to the bag you icing may be to thick. Add a little more water to the icing to thin it out a bit.
- Once you add your icing on your cake using the thin consistency icing you want to set your cake aside to let it set. You don’t want to begin embellishing your cake if the icing is still wet. And if the frosting is all bumpy and you see lines and it is not smooth, not to worry. (again, if I only knew this years ago!).
- When the icing on the cake has set you are going to take parchment paper on top of the cake and gently rub the frosting to make it nice and smooth. I never knew this! Wow! I couldn’t believe what I saw happening before my eyes. The cake was becoming nice and smooth. Now if when you are rubbing it with parchment paper and frosting is coming up your cake may not be dry yet and you need to let it set longer. To test to make sure its set gently touch the frosting with your finger, If it is firm and no frosting is coming up it should be ok.
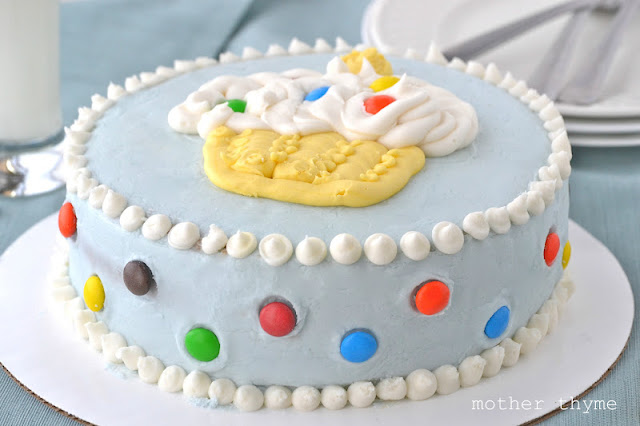
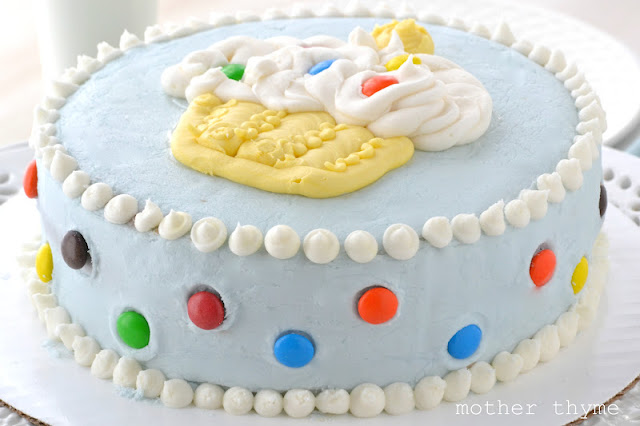
- Piping gel is probably the best invention ever. Have you ever used it? So you trace your design with piping gel and then turn it over on to your cake and voila you have an outline of the design you want to frost. You may be able to see how my cake here the outline of the piping gel. I did that so I could show you. Ok, maybe not; I didn’t go over far enough when I was piping the icing in but it shows you how the design looks. This stuff is the coolest ever. I always wondered on designs got on the cake. Well now I know how to do it. This stuff is so cool and super easy to use. You place the piping gel in your bag and use a thin like #1 tip to outline.
I think by the time this class is over I will have invested in every Wilton product available.
Do you notice I don’t have any pictures of just a slice? I’m afraid to cut it as I want to keep it just like this. I’m such a goof. But just in case you are wondering I made a white cake with a chocolate pudding layer. If I ever cut into it I may take a picture but in the meantime I’ll just stare at is like this.


Whoa Jennifer! So impressive! Thanks for the tips, bookmarked this for future cake endeavors!! Yours turned out so professionally!
Wow, wow! Jennifer, this is a great post. I shy away from layer cakes because I can never get them even, and I am horrible at frosting them. This is great info, and that is a beautiful cake!
I would love to learn to decorate cakes! I rarely make full sized cakes because my skills are so very lame. This cake is wonderful!
Wow Jen that looks fantastic!!!
I love the tip about making your own little outline. I never would have thought of that but it’s so simple and clever.
I can’t wait to see what you come up with next.
What great tips! I love that cake too. I have been meaning to take that Wilton class forever. I need to get in there and do it!
That’s a beautiful looking cake…Thanks for all the tips. Look forward to reading more about your classes 🙂
That is so cute .I took a cake decorating class years ago and loved it now you have inspired me again .
Thank you
Thanks for sharing all your tips! The cake is beautiful. 🙂
LOL that’s the first cake I made at the Wilton course 1 recently. I haven’t taken course 2 yet. That’s coming. I don’t eat many cakes but knowing how to decorate means I’m always ready to make a celebration cake.
Impressive!
I just read part 1 and 2 of your cake decorating posts. Awesome! And really helpful I’m just now starting to experiment with decorating.
Thanks for the comprehensive tutorials! It’s so nice of you to put in all the effort 🙂