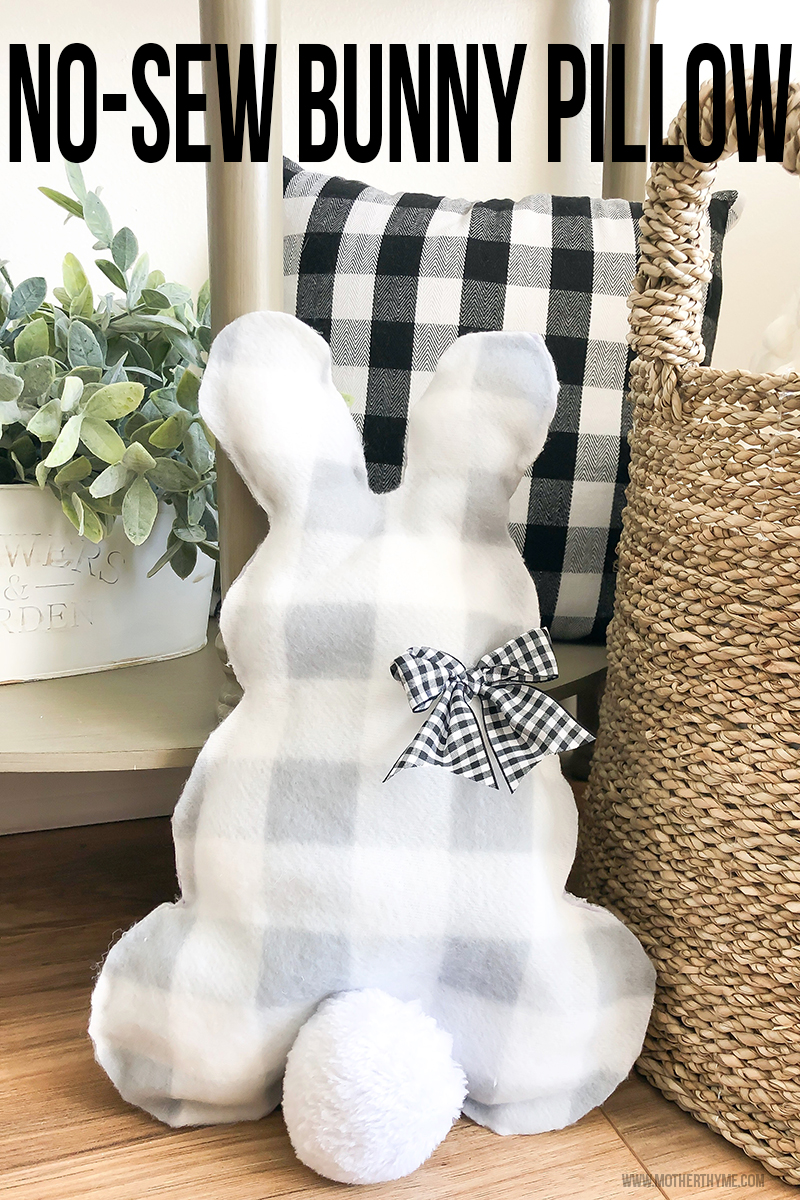
No-Sew Bunny Pillow
Create this super easy no-sew bunny pillow in minutes using just a few supplies and this free bunny template!
Meet the newest addition to our bunny family! Isn’t he cute? Not only is he cute he’s so soft too! I used this soft gray and white check baby blanket fleece I got at Dollar Tree to create this bunny pillow.
He make a cute pillow, or make a hole on the top, add some twine or string and hang him!
Mr. Bunny is complete with a super fluffy bunny tail from Dollar Tree. It just attaches on with a clip that it comes with. If you can’t find these cute bunny tails, you could use a large pom pom, but the Dollar Tree is worth the hunt to find!
He measures just about 15-inches tall and 14-inches wide at the widest point. With the gray and white fleece baby blanket you can make several of these bunnies, or keep the left over fabric for other projects. You can use any scrap fleece you have on hand, or even make using fabric or burlap! So many possibilities!
What you need
- Dollar Tree gray and white check baby blanket (or any fleece, burlap or fabric of your choice.
- Filling – I like Mountain Mist polyester fiberfill from Joann
- Dollar Tree bunny tail – or a large pom pom
- Ribbon for the bow
- Glue gun
- Good scissors
- Free template HERE (This is a template I created for personal use only. See notes below for printing instructions.)
Print template
To print template, download the PDF template HERE. When you click print make sure you change your settings to ACTUAL SIZE. If you don’t it will scale it down and it will be smaller than the original. Some printers may cute off the bottom of each page. Once you attach the two pages, just fill it in with a pencil to have the complete bunny.
This is 2 pages. So once you print it, simply line up the 2 sheets of paper and tape it together. Then cut it out and you have your bunny template ready to use!
Cut Fabric
Once you have the bunny template cut out, it’s time to cut your fabric. Simply place the template on your fabric and trace it out on the wrong side using chalk, a frixon pen, or disappearing ink. Don’t use a sharpie or it will show through!
You’ll need to cut 2 bunnies from your fabric.
Remember to draw and cut on the wrong side of the fabric.
Place your 2 cut out bunnies WRONG SIDE together. You want the better side now facing out.
Trim them up if once is cut differently than the other if needed. You can do this at the end too.
Seal seam/edges
It’s time to fire up the hot glue gun to seal the edges. CAREFULLY go around the edges of the fabric. I like to go little chunks at a time to seal it up.
DON’T GO ALL THE WAY AROUND. Leave a few inches at the bottom to add stuffing.
Add little, light ribbons of hot glue or fabric glue and then carefully and gently press down to seal the fabric.
You can always go back after it’s stuff to close up any seams that you may have missed.
TIME TO STUFF
With the open pocket, gently add filling. Start with the ears first. I also like to stuff the sides first so it’s nice and plump, then the center last.
Once it’s stuffed to your desired fullness, carefully seal up the bottom with hot glue.
Trim any excess fabric if needed.
BOW AND TAIL
Once your cute bunny is complete it’s time to add the bow and tail.
If you’re lucky to find a Dollar Tree bunny tail, just clip it on the bottom. You can use a large pom pom too.
Make a bow using any scrap ribbon you may have and hot glue it in the center, on top, or on the side.
If you want to hang him, just make a hole with on top in between his ears and use twine, ribbon or string to make a hook to use to hang.
If you make this cute little bunny I’d love to see! Snap a pic and tag me on Instagram @motherthyme!
You can check out my Instagram story highlights on how I make this too. A blog tutorial will be coming soon too!