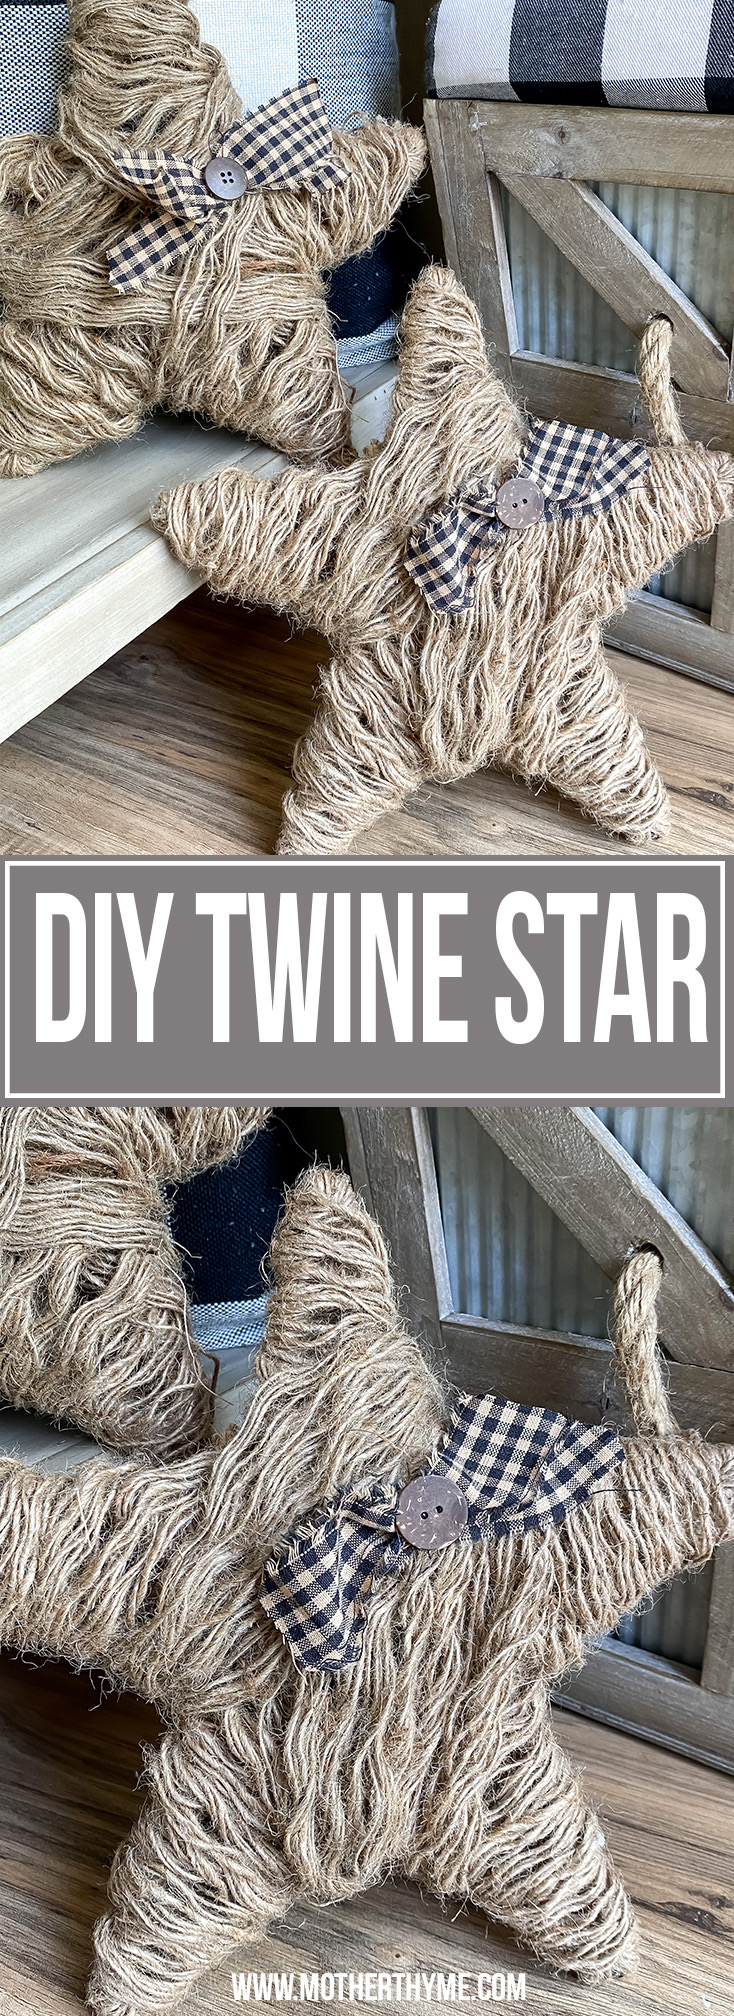
DIY Twine Star
Whip up this DIY twine star with just a few supplies from Dollar Tree!
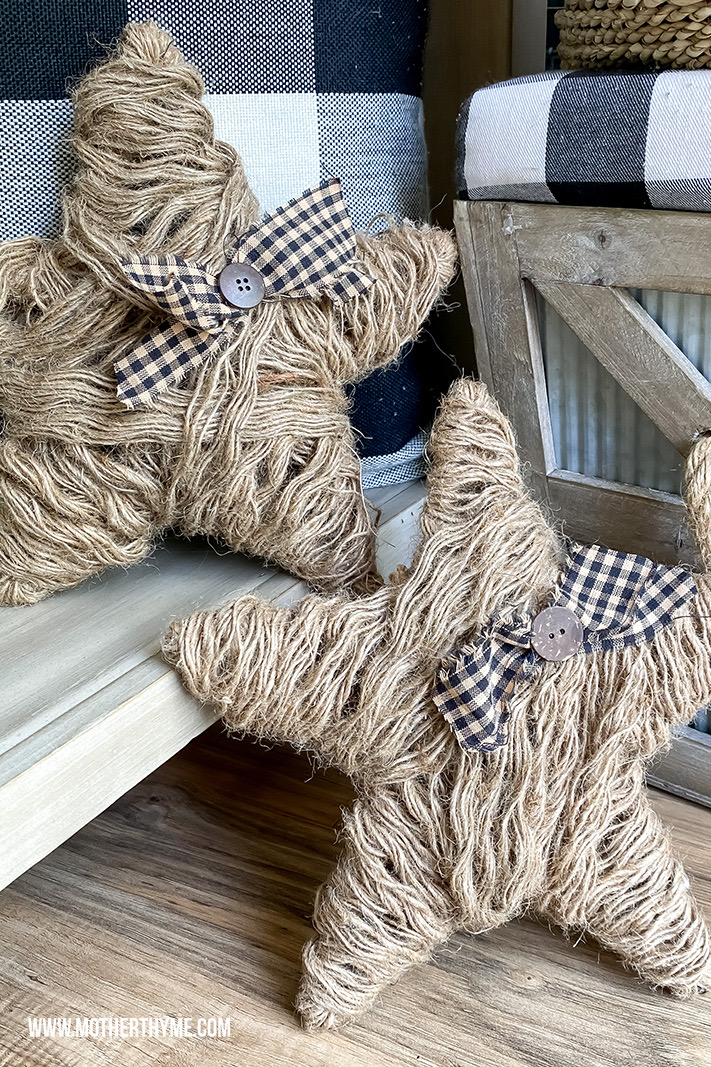
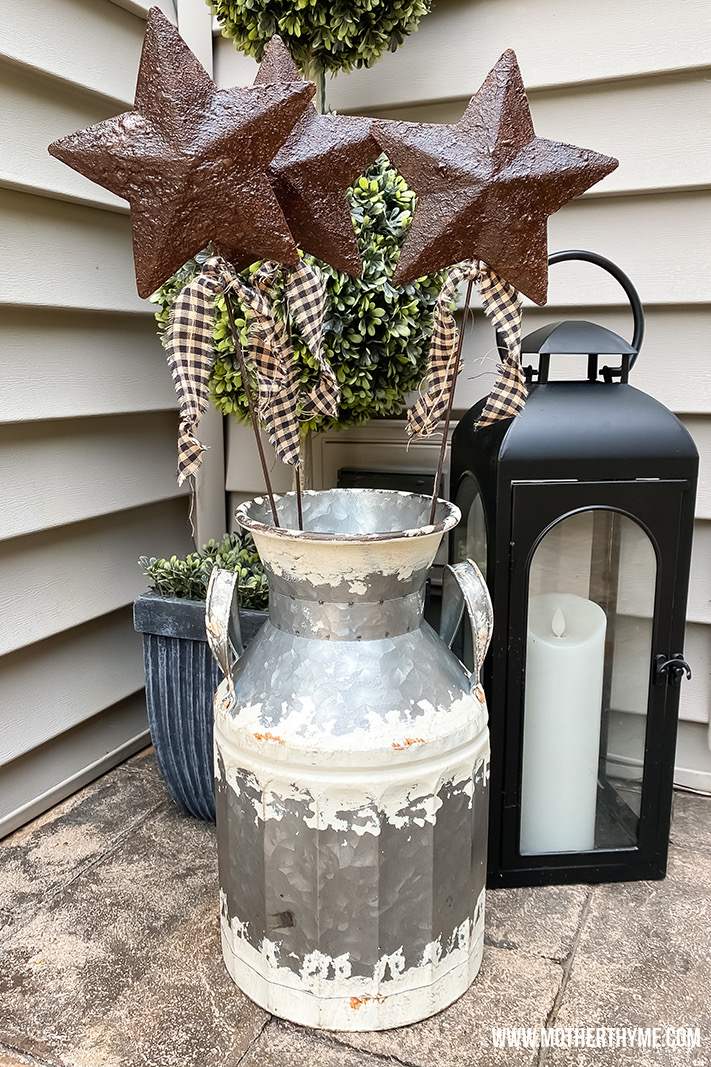
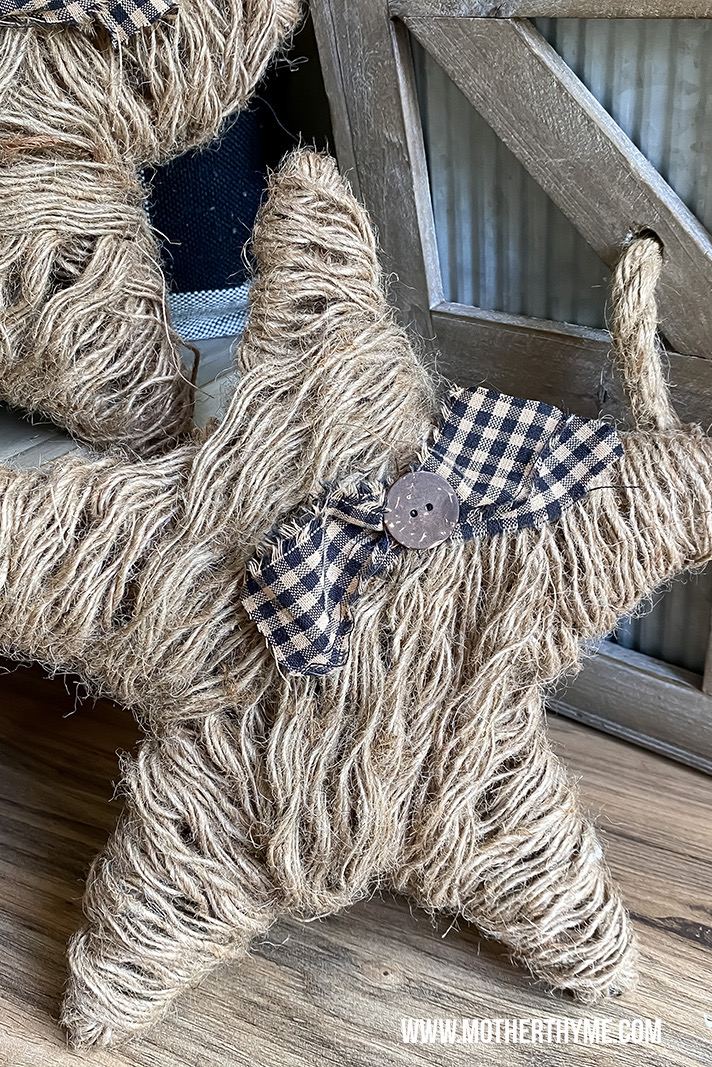
I am in love with these twine stars! I plan on using them year round. I also plan on making some to use on my Christmas tree too! These would be super cute in a bowl or dough bowl as bowl filler, tucked on a shelf or table or hung on a door.
These are really easy to make and you can customize them to however you’d like. I kept mine simple with a little torn homespun bow.
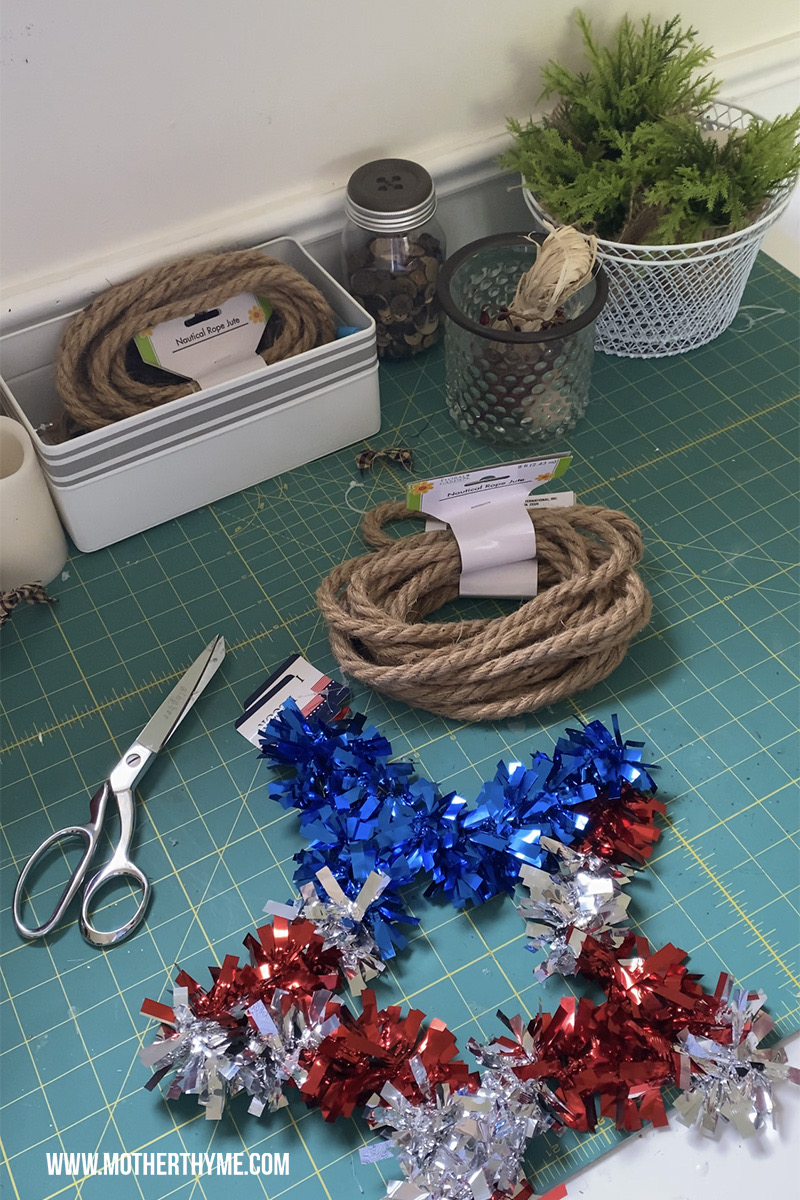
SUPPLIES
- 1 tinsel star from Dollar Tree
- 2 packs of nautical rope from Dollar Tree
- Hot glue
- Scissors
- Wire cutters – optional
- A piece of homespun fabric for bow
- Button
Step 1
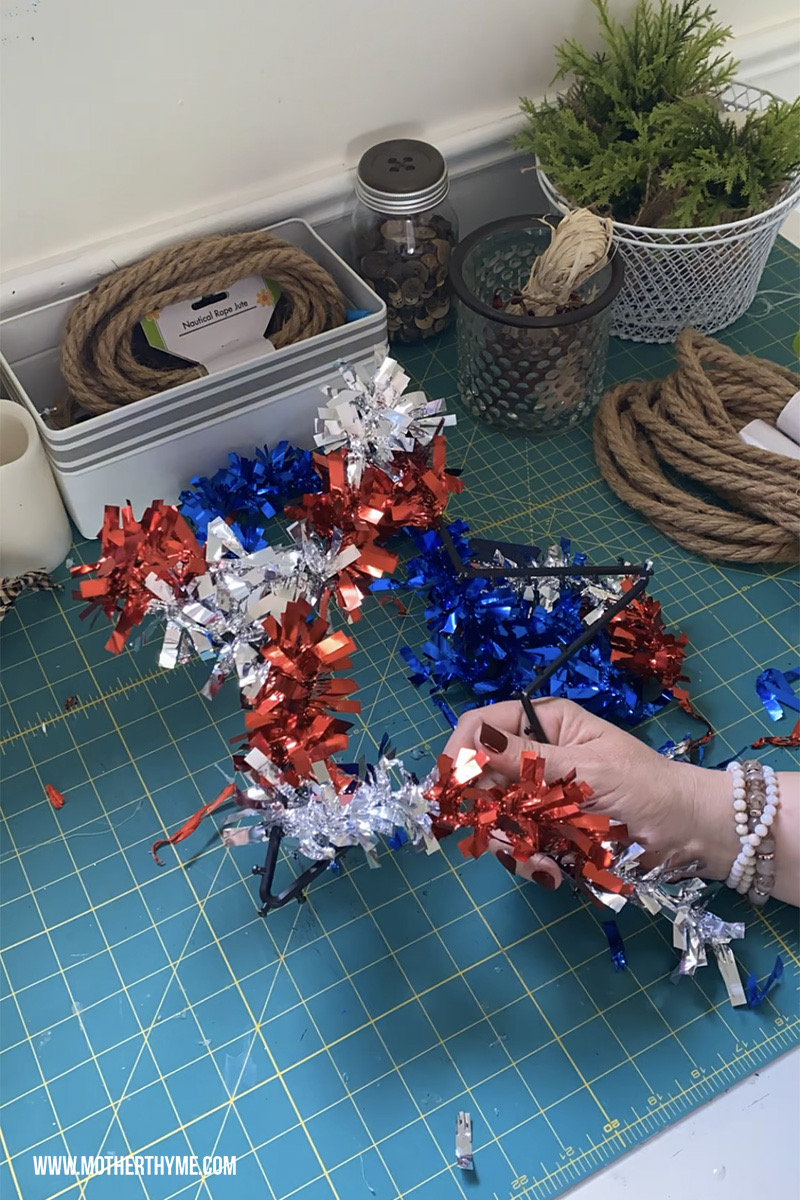
Remove tinsel from star. I snip a little piece of the tinsel and then twist it back and forth to remove the tinsel garland from star. I snip it with my scissors here and there when needed.
Step 2
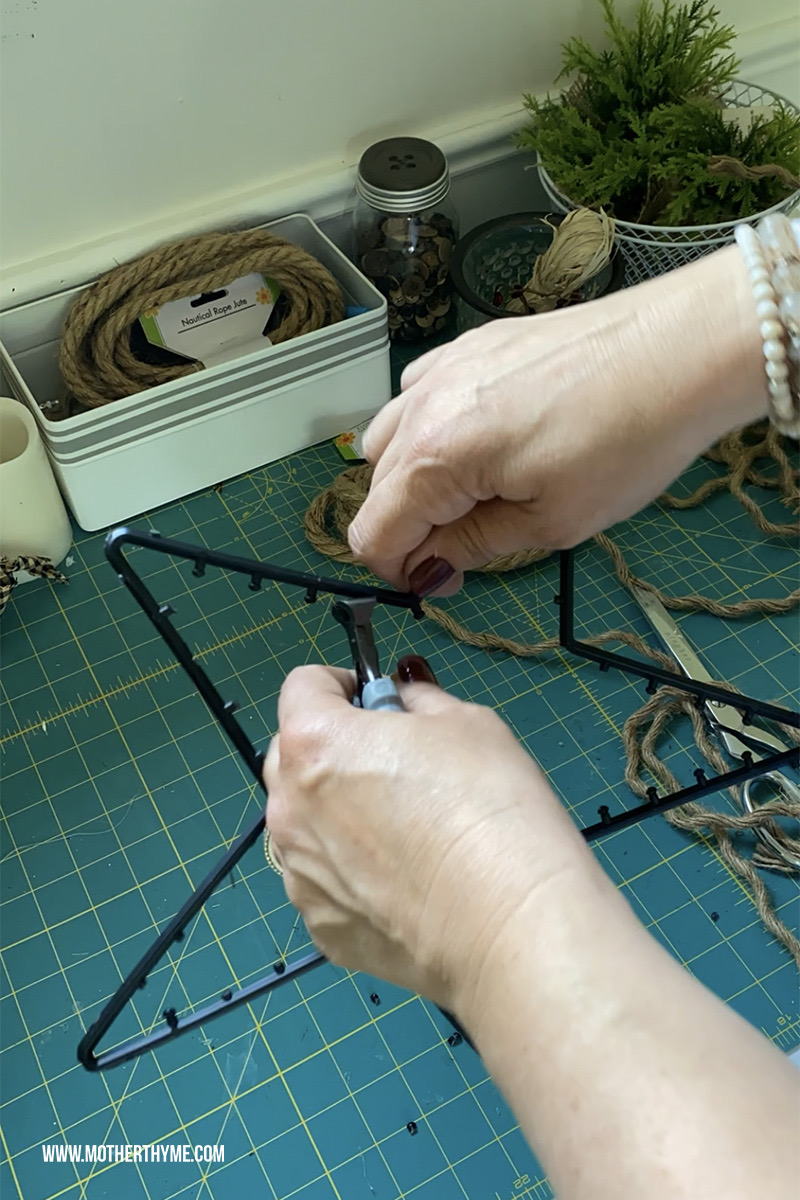
Remove the little plastic hooks on the star. I used wire cutters to easily snip them off but scissors work too.
Step 3

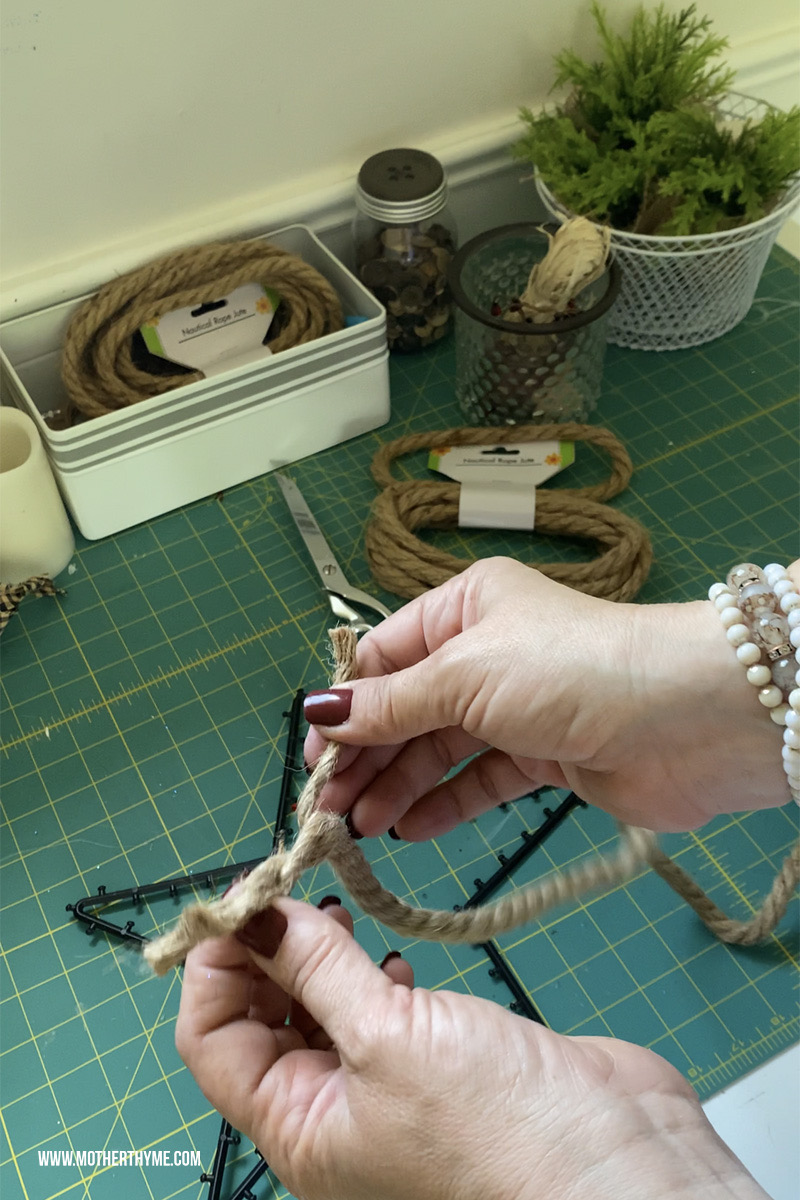
Remove nautical rope from packaging, snip off the tape on the ends. Peel the 3 strands of nautical rope apart like you would a Twizzlers.
Step 4
Take one of the three pieces of nautical rope and and wrap it around the star attaching it with hot glue.
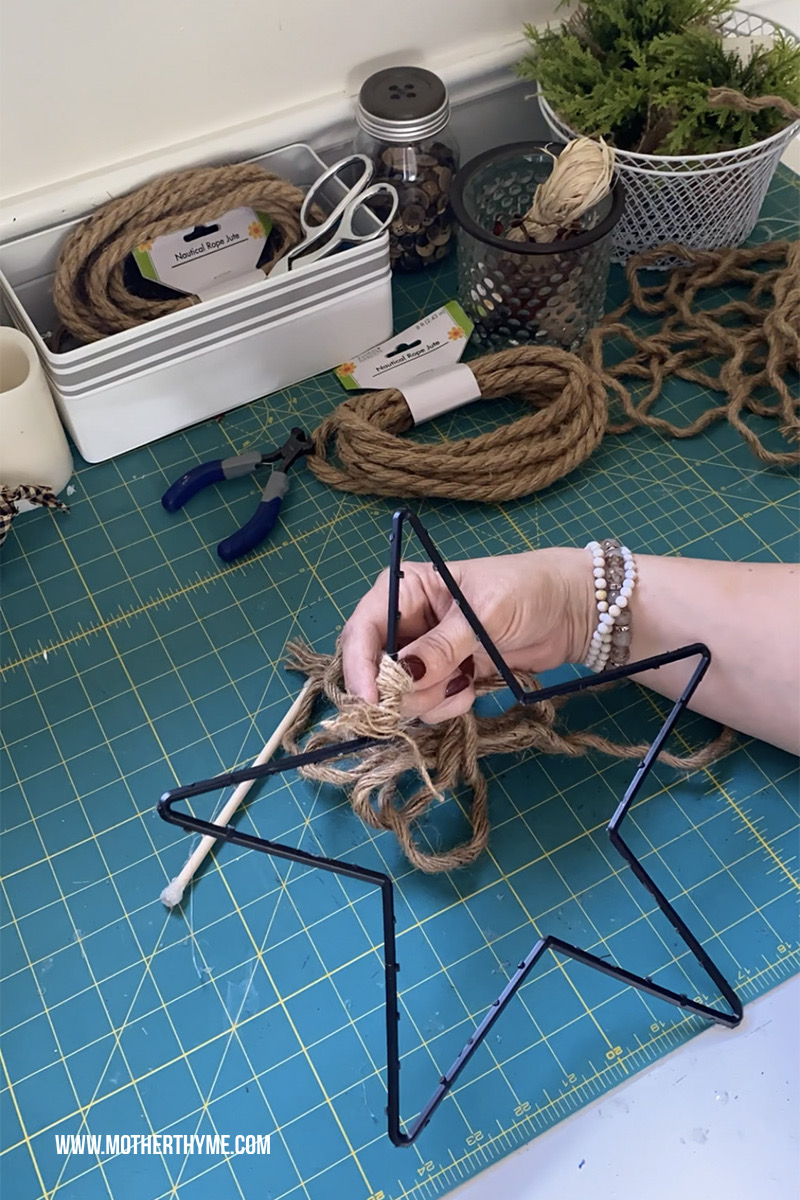
Step 5
With the remaining 2 pieces of rope, I comb it with my fingers so it’s stringy.
Step 6
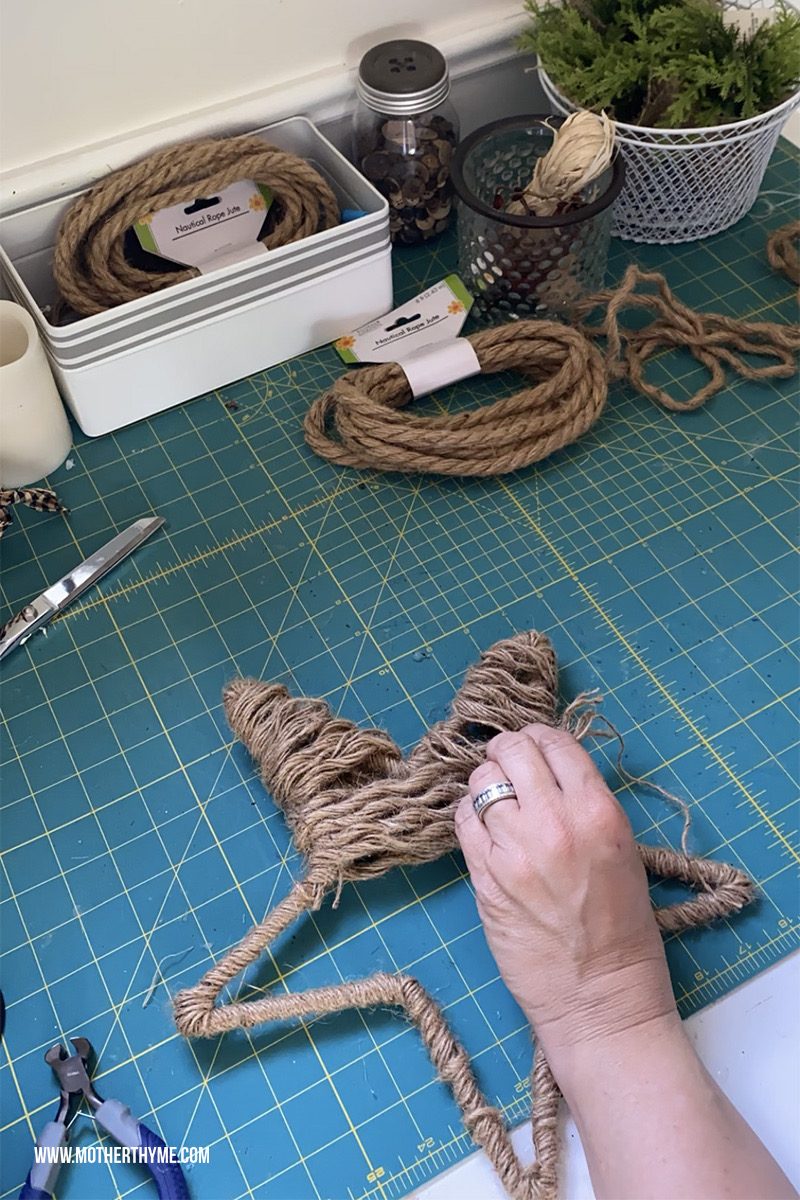
Take one of the pieces and hot glue it to the back of the star and start criss crossing it and wrapping it around the star. Once I got to the end attach it with hot glue and continue with the second piece of rope.
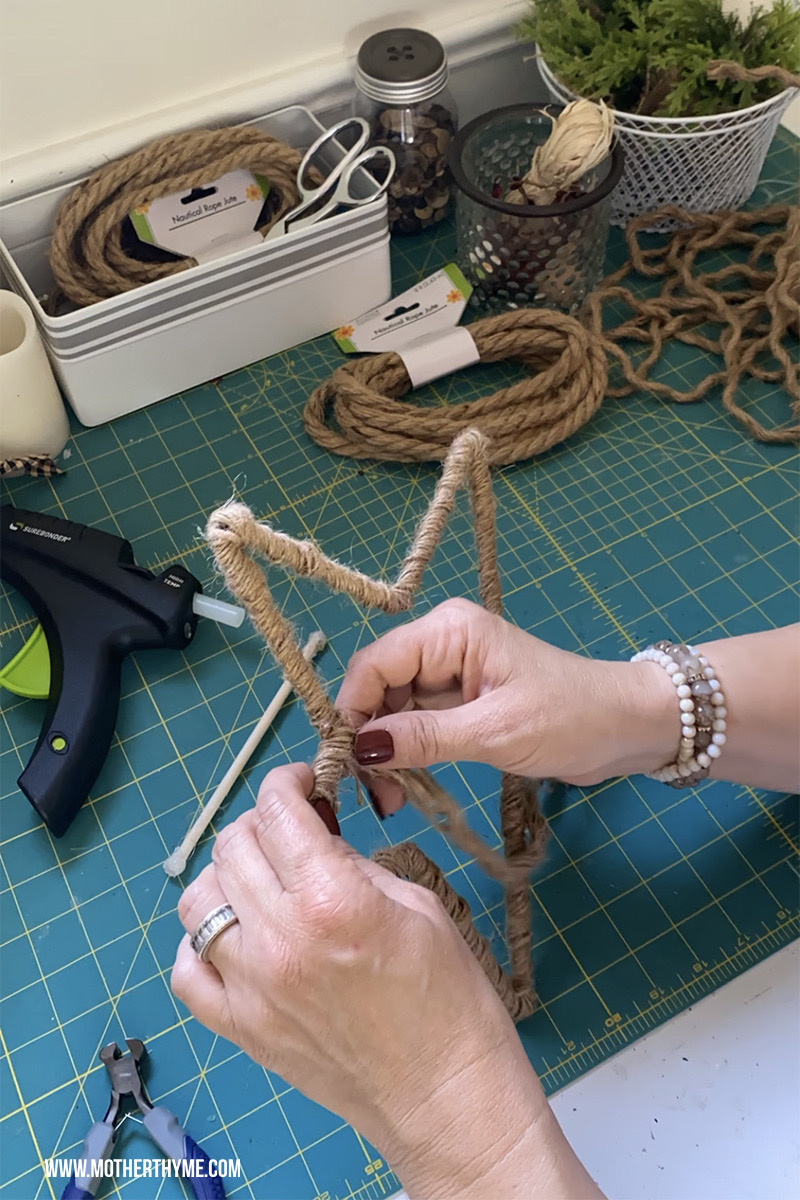
Step 7
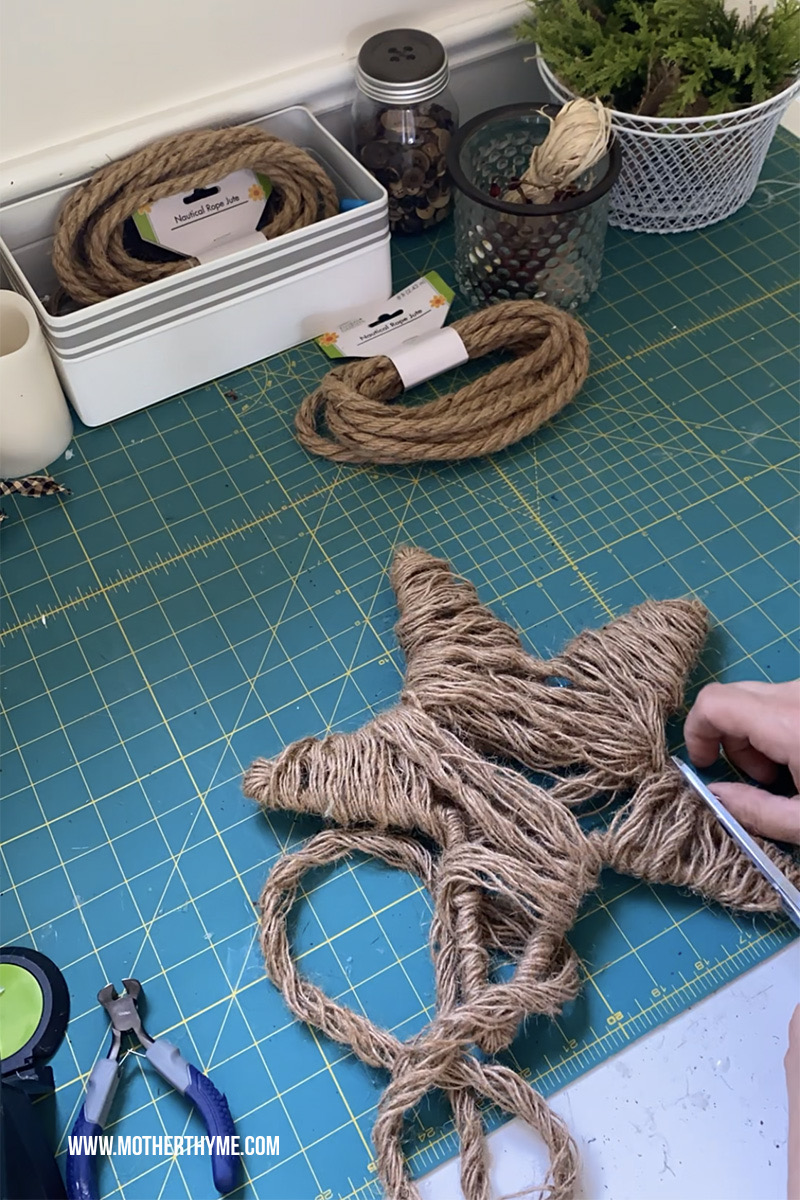
Peel apart the second strand of nautical rope like I did with the first one so I was left with 3 strands. I only ended up using 1 strand from this bunch and had 2 leftover.
I combed through this piece so it was stringy as I did with the other pieces and filled in the rest of my star, hot gluing it at the beginning and end.
Once I was happy with the way it looked I did go around and added a little hot glue in places to keep everything in place.
Step 8
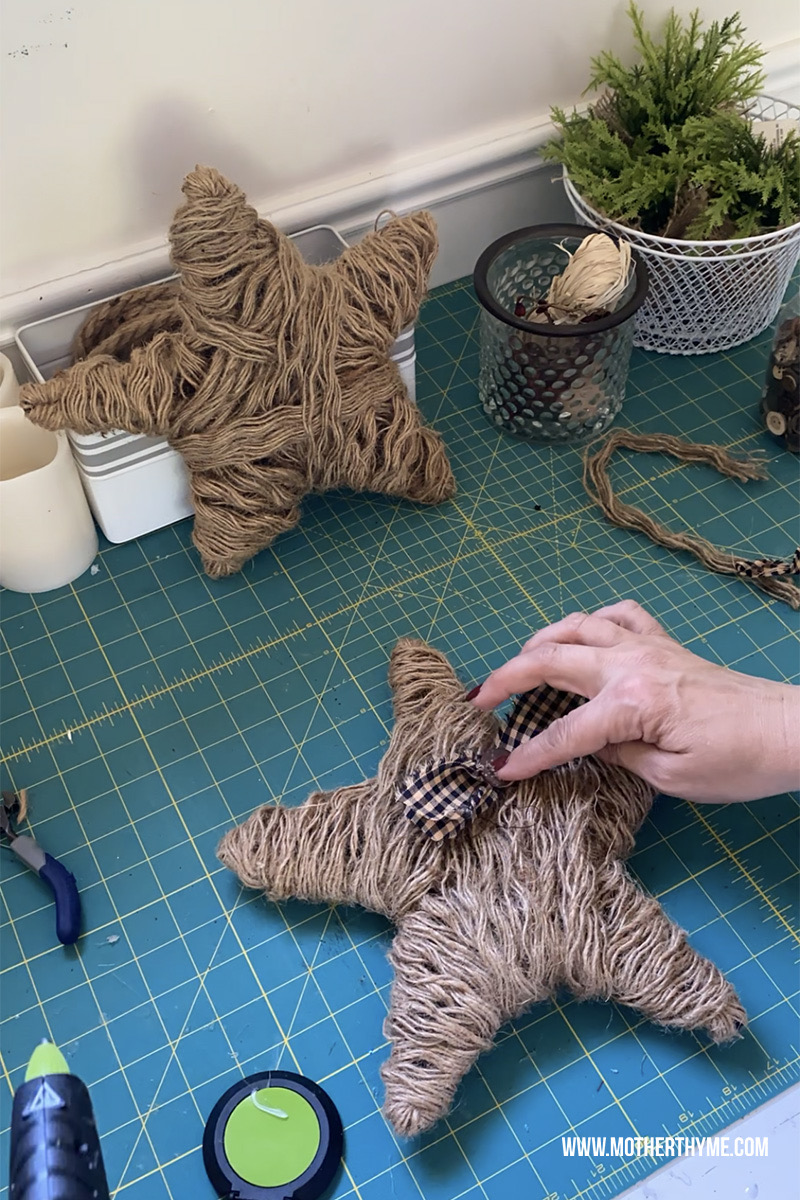
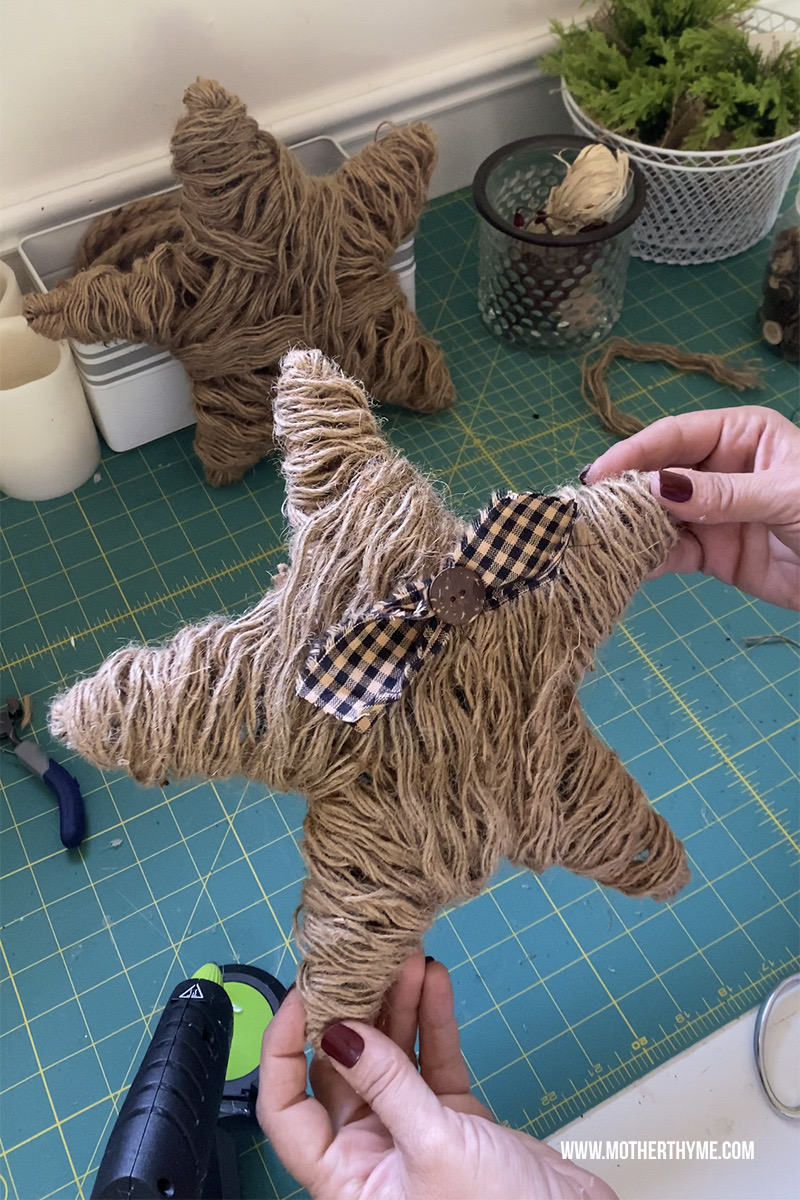
To finish it off I took a piece of torn homespun fabric, fold it in half and tied it in the center with a piece of twine then cut the folded side of the twine so I had a little shabby bow.
I hot glue it to the star and topped it with a little button.
And that’s it! Easy peasy my friends!
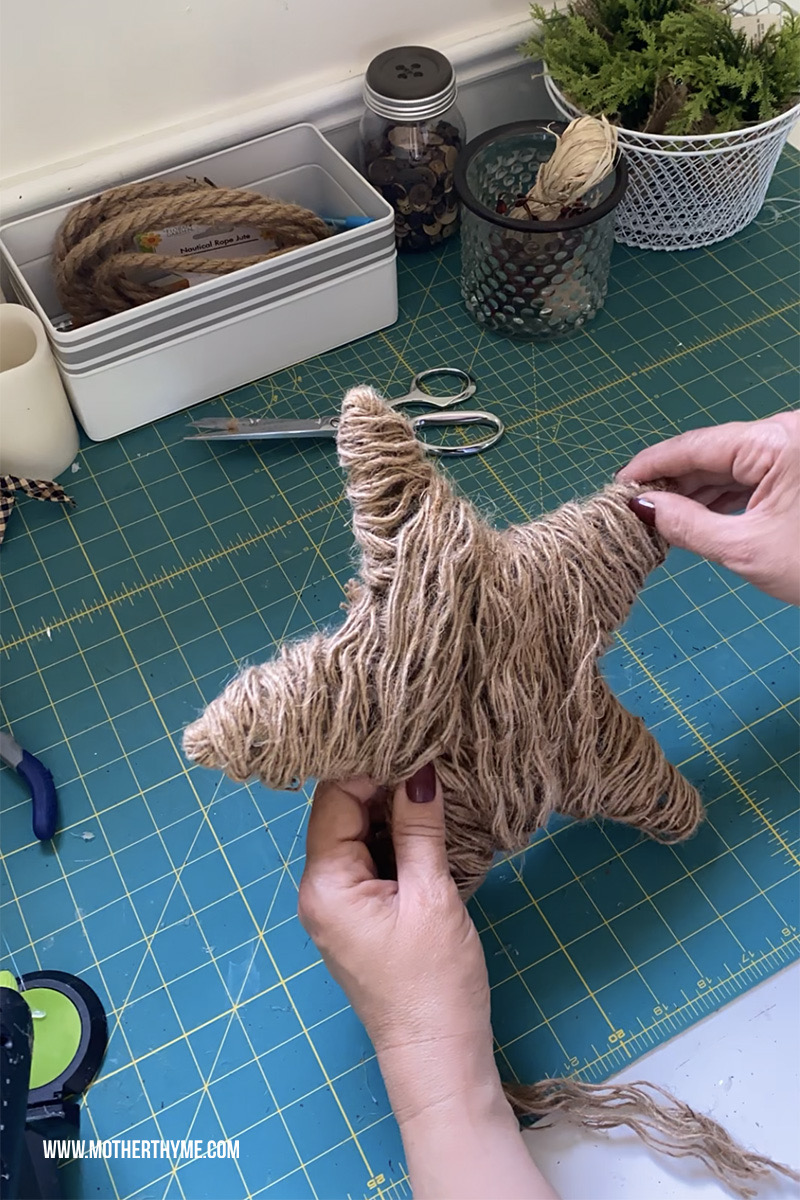
To get the look like mine, make sure you comb through the strands so it’s stringy. And just wrap around however you’d like. If you don’t like it, unwrap and go another way to you get the look you want.
I used 1 strand to go around the star, and 3 strands to weave back and forth.
If you make one of these darling stars too I’d love to see! Snap a picture and tag me on Instagram at motherthyme!
You can also see how I made these on my Facebook and Instagram page!
Happy crafting!